How to generate labels using BMS and MailMerge in Word
- Valérie Boire (Unlicensed)
- Corina Habito
- Graham McLaren
Use the BMS Excel/CSV output file as the list of "recipients" in MailMerge.
Label templates
| Purpose | Word template | Printer | Stationery type | Stationery brand, model | Number of labels | Example BMS output in excel/csv |
|---|---|---|---|---|---|---|
| Storage | 1_Label Template_STORAGE_W111_Tower.dotx | Page printer | A4 loose leaf adhesive | Tower W111 | 16 per sheet (2 columns x 8 rows) | 1_ImportList with inventory.xls |
| Packing of germplasm for planting | Template_AdhesiveLabels_CLPS1020SWH_v3.dotx | Page printer | loose leaf adhesive | CLPS1020SWH | 40 per sheet (4 columns x 10 rows) | Labels-for-2021 Trial CH_example for testing.xls |
| Field plots | 5_Template_TagLabels_VLX1081SWH_v3.dotx | Page printer | loose leaf weather-proof sheet | Valueline VLX1081SWH (1" x 8 1/2" Laser Slip-On Tags) | 10 per sheet | Labels-for-2020 AYT TRIAL-for testing.xls |
| Field plots | Template_FieldPlotLabels_10cmX5cm_Roll for Zebra ZT230.dotx | Continuous-feed Zebra ZT230 | Roll | TEST Labels-for-CH Trial 2021-PLOTDATA.xls | ||
| Sampling for genotyping | 4_Label Template_EXPORTSAMPLES_W111_Tower.dotx | Page printer | A4 loose leaf adhesive | Tower W111 | 16 per sheet (2 columns x 8 rows) | Samples1_.csv |
Instructions
1, Load onto the printer the appropriate label stationery.
2. Open the appropriate label template in Word (depending on study type, stationery readily available)
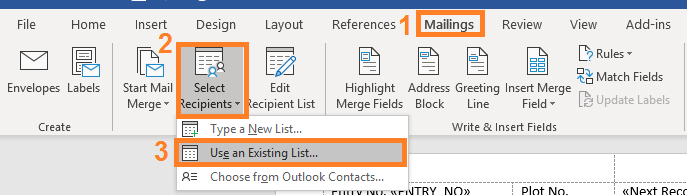
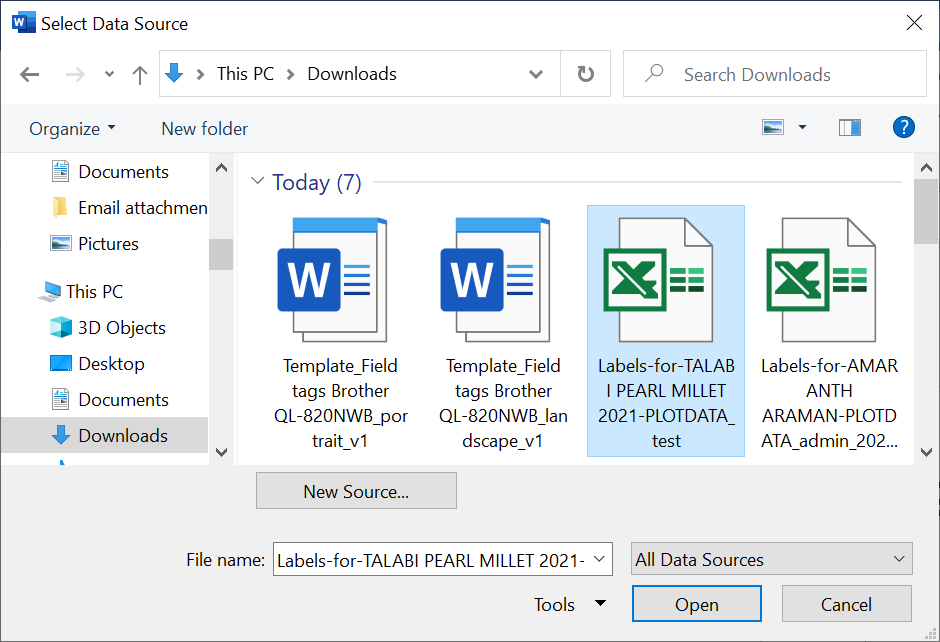
3. Click on 'Mailings' tab, then Select Recipients :: Use existing list. Select the Excel file generated by the BMS label printing tool and downloaded earlier.
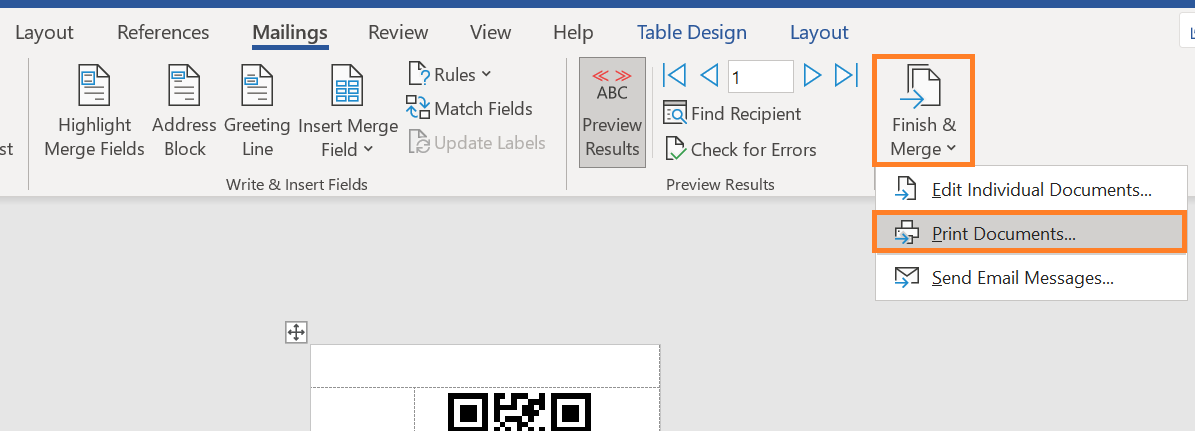
4. On Mailings tab, click Preview Results, then Finish & Merge :: Print Documents

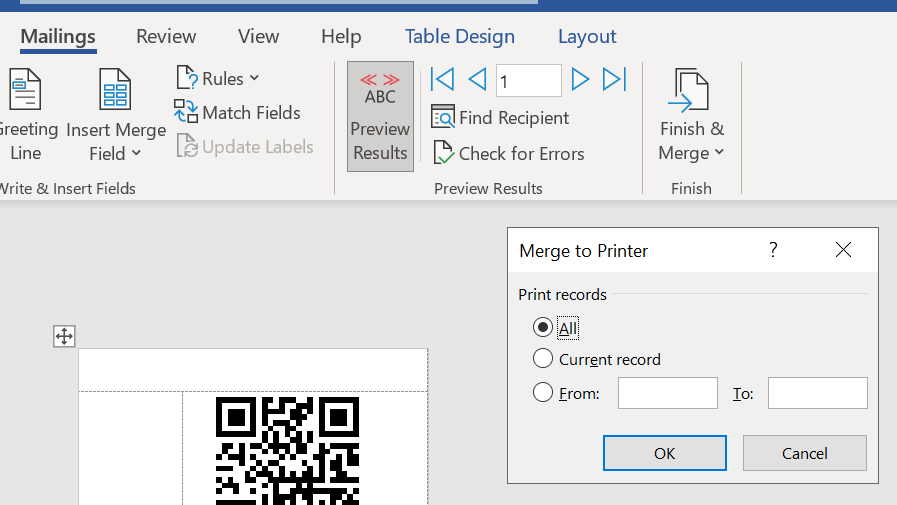
5. Specify the number of records for printing (1 record = 1 label = 1 plot), and click OK. For testing purposes, it is best to print only a few records to minimize waste of the label stationery.
6. On the Print popup, select the appropriate printer and click OK to proceed with printing.