Managing evaluation trials
Trials are evaluation experiments managed through the Study Manager. They are generally multi-location, replicated and randomized.
Objectives
At the end of this tutorial, the user should be able to:
- Create a trial for germplasm evaluation
- Prepare seed and print labels for a trial
- Use sub-observation units to collect sub-sample data
- Export a fieldbook and import collected data
- Validate collected data and compute calculated variables.
Create a multi-location trial
First you need to prepare a germplasm list with test and check entries to be planted in the trial. We are going to use the list of imported germplasm we created in the Import Germplasm Tutorial. Probably called <your initials>GI21– CGMGI21 for me. Use LISTS>Germplasm Lists>Browse to view it.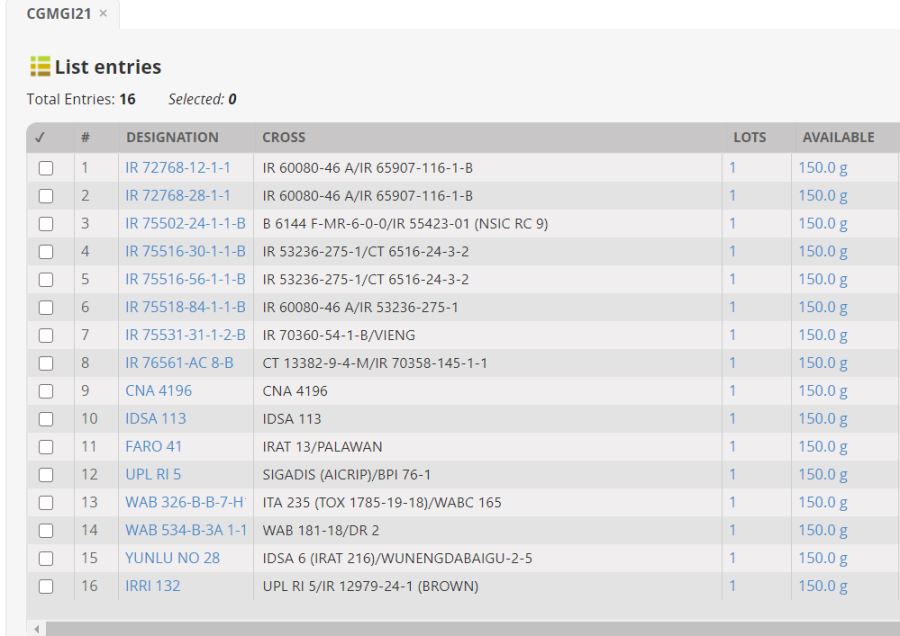
Open the Manage Studies application from the STUDIES menu and click on Start a new study. Name the trial <your initials>21PVT, CGM21PVT for me, and fill in the basic details of description and objective and select the study type Trial.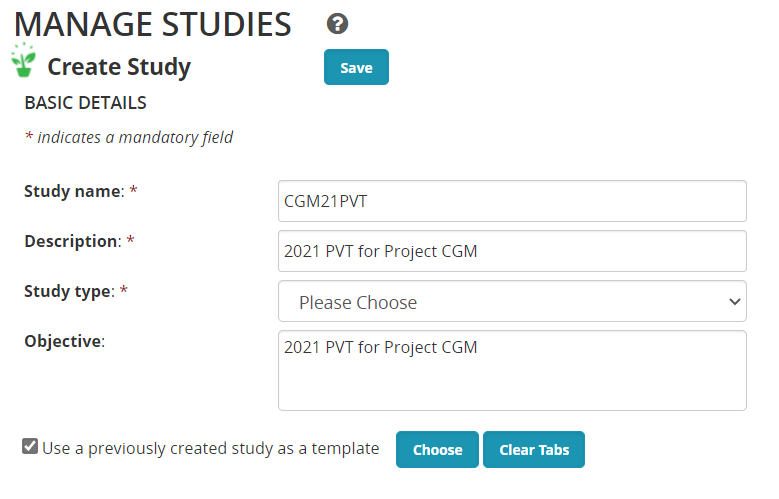
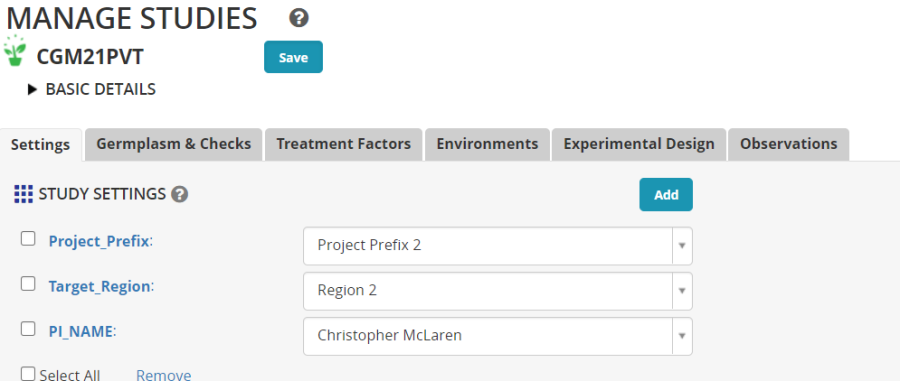
You can add variables to the new study directly from the Ontology pick lists as we did for the crossing block, or you can pick up all the variables from any previously used study. To use this option check the Use a previously created study as a template check box. Then choose the previous study which is similar to your current study. We don't have a previous trial yet so we will use a nursery: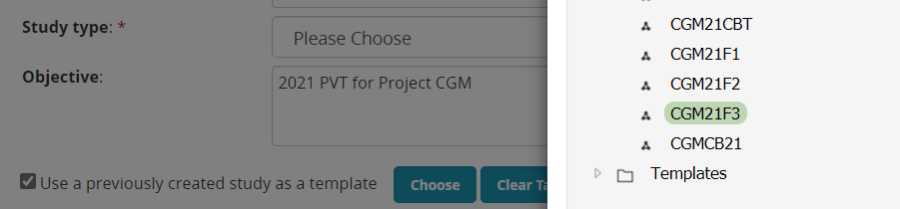
The variables from the template study are imported into the new study. Change the settings if needed and Save the study in a new folder <your initials> 2021 Trials (CGM 2021 Trials for me).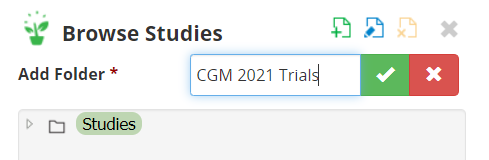
On the Germplasm and Checks tab, the extra variables for Cross and Seed source are also recovered from the template, so you just need to Browse for the list of planting material. The imported germplasm list you made in the Import Germplasm Tutorial. CGM21GI in my case.
You can set the Check entries on the Germplasm Tab. Click on the entry type for the line(s) to be made checks, (we will make IRRI 132, the last entry, a check entry), choose Check Entry from the list and click accept.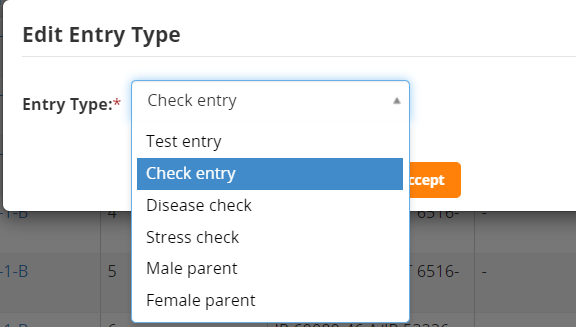
On the Environments tab set the number of environments to 3 and click OK.
Mbe has been inherited from the template for the first environment, and this location is still correct, select IITA-Ibadan and Africa Rice CENTER as the other two locations. You will have to uncheck Show Favorite Locations since we have not specified favorite locations. Click Add next to Environmental Details variable, and search for Seeding date and Plot size and add them to the Environment Details section. Enter 5.2 m squared for the plot size at each location. You may not know the Seeding date at this time.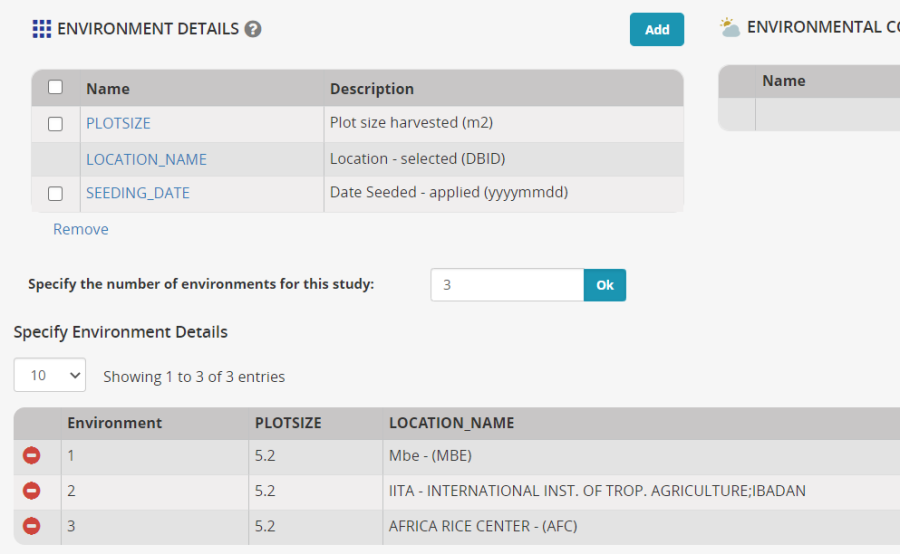
On the Experimental Design tab select Resolvable Incomplete Block Design (Alpha lattice), enter 2 for number of replications and 4 for block size then click Generate Design.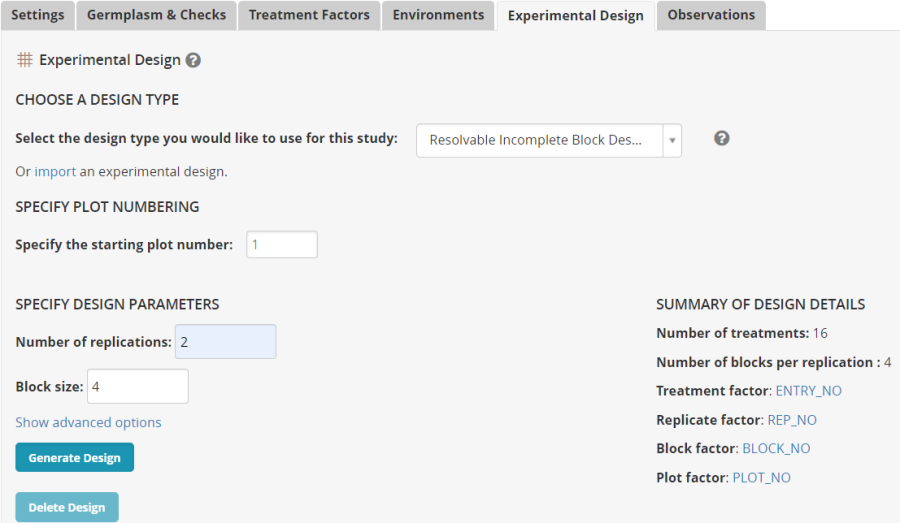
Generate the design for all locations: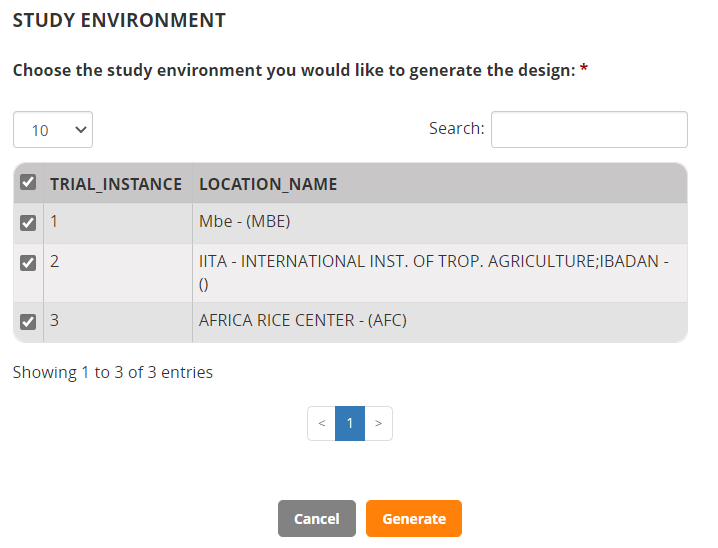
You will get a success message and now the Observation tab will contain a fieldbook. At the moment the only trait there is the date of 50% flowering inherited from our nursery so we will add some more traits. Click Add next to the traits box. Search for FLW50 and add it to the trial. (If you cant find FLW50 use TFlwS_CM-d).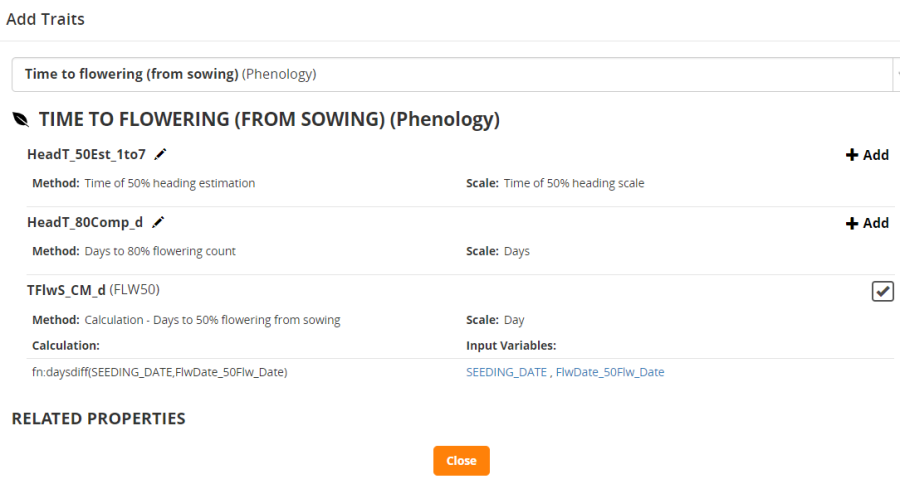
Notice that trait TFlwS_CM-d has Alias FLW50 and has a computation formula associated so that it can be calculated within BMS.
Add GrYld_wgh_gplot, then GRMOIST, and finally GYTHA which is also a variable which can be calculated in BMS.
The traits box now looks like this: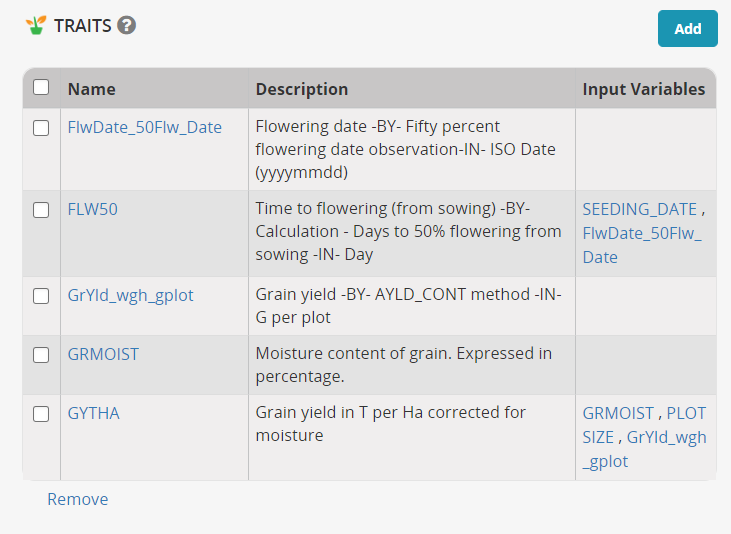
Prepare seed and planting labels
To prepare seed for a study you must select the plots for which you wish to prepare the seed.
To select all plots, from the Observation sheet you must set the Select Environment box to All environments and check the Select all pages checkbox: 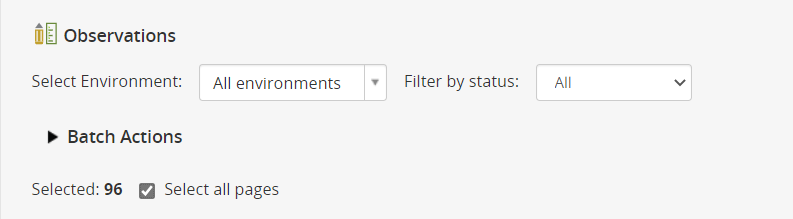
We have 96 plots – 16 entries by 3 location by 2 replications.
Next select Actions>Design and planning options>Prepare planting inventory: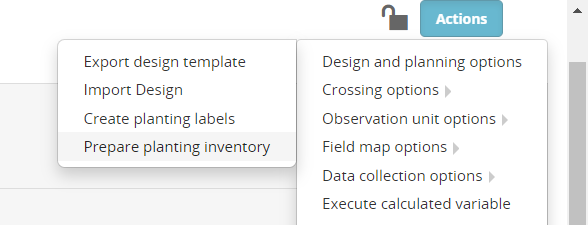
The Prepare inventory form shows a box for specifying the amount of seed to pack per plot (packet) and a table showing the number of packets for each entry and the total seed amount specified for packing.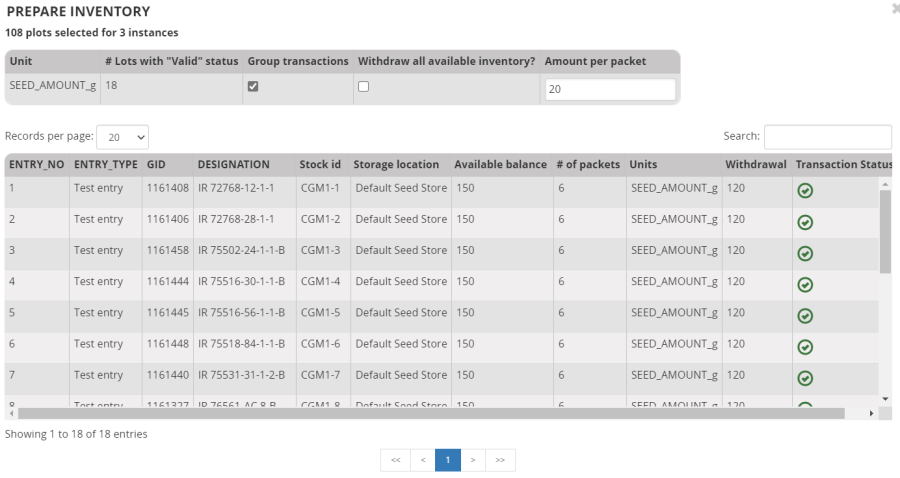
You can add a note at the bottom of the form and if you are the one to do the packing you can Commit the withdrawal on saving. (If a store manager will do the packing you should not check the Commit withdrawal on saving checkbox because the store manager will commit the transaction when the packing is complete). Click Confirm.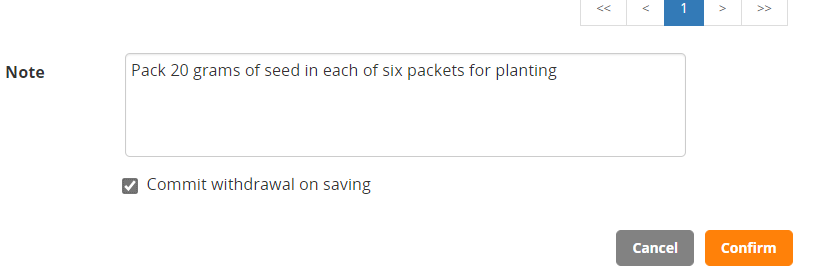
A new tab called inventory has been added to the study showing the seed preparation transactions.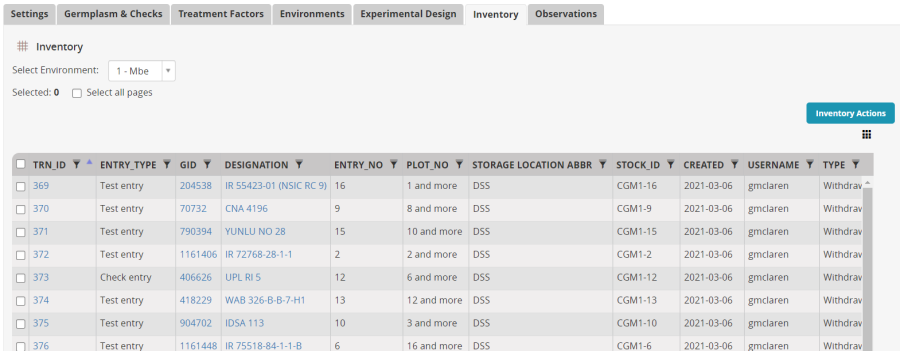
To prepare planting labels select Actions>Design and planning options>Create planting labels: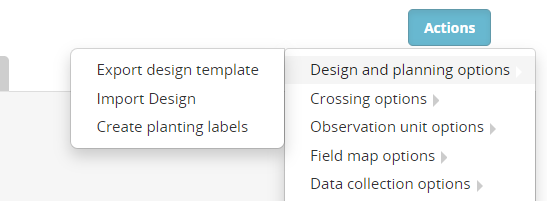
On the Export Data form, select Excel Data for the Output format and then drag the following variables to the Selected Fields box: Lot UID, Stock id, DESIGNATION, ENTRY_NO (these variables say where the seed is to come from) then add Study Name, LOCATION_NAME, PLOT_NO and PLOT OBS_UNIT_ID (and these variables say where it is going).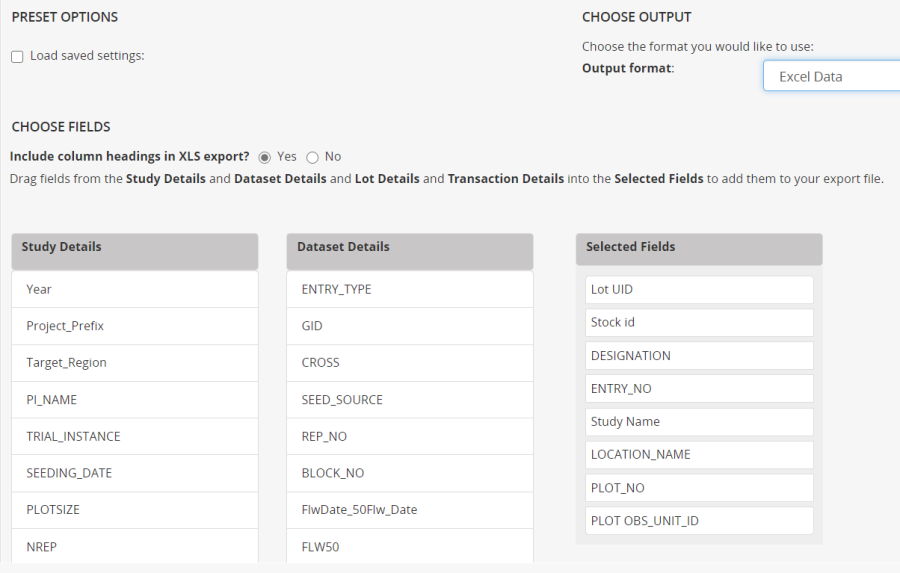
You can save the setup for future use with the name SeedPrep and then click Export to generate the labels file.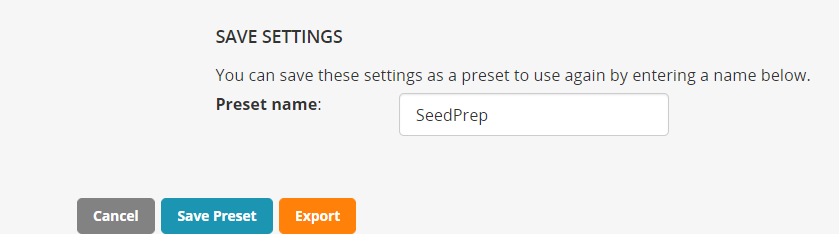
Now the labels should be printed with a label printing software such as Microsoft Word Mail-merge function. However the label records are currently in plot within location order, and for the packing process you want to have all the labels for each entry together. You can achieve this order by sorting the excel sheet on Entry_NO before you print the labels with mail-merge.
The fields Lot UID and/or PLOT OBS_UNIT_ID can be printed as barcodes to facilitate bar code use in packing, sorting and planting.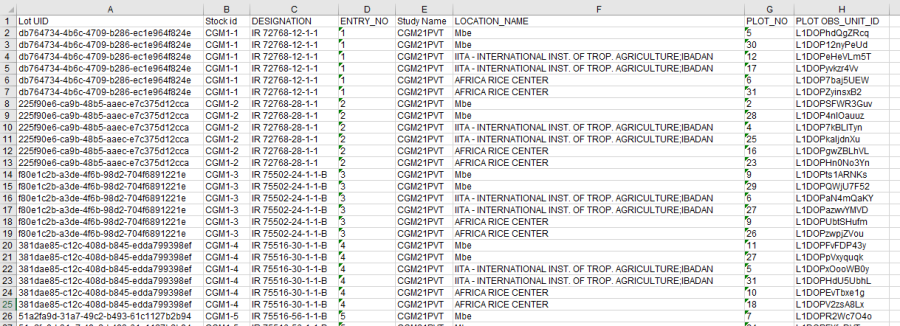
Set up sub sample units to collect sampling data from plots
The BMS is able to have sub-sample observations sheets for the collection of data from multiple samples from each plot. To set up a sub-sample observation sheet, open the trial in the trial manager and select Actions>Observation unit options>Create sub-observation units: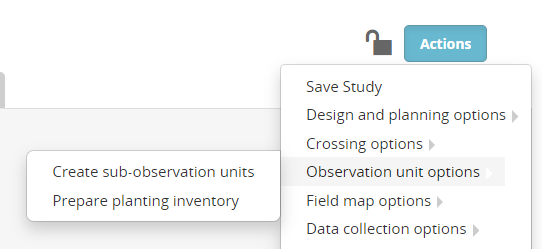
Select the type of sub observation units you want. In our case Plants: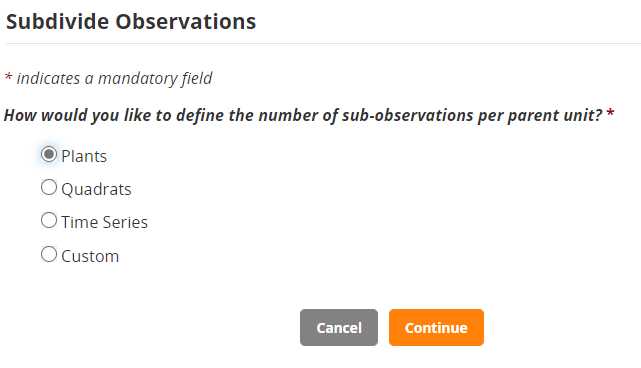
Specify a name for the sub-sample data sheet – we use PlantData, specify the number of plants to be sampled from each plot – 5 in our case, allow the variable to number the plants to be called PLANT_NO, and select all locations for sub-sampling. Click Save.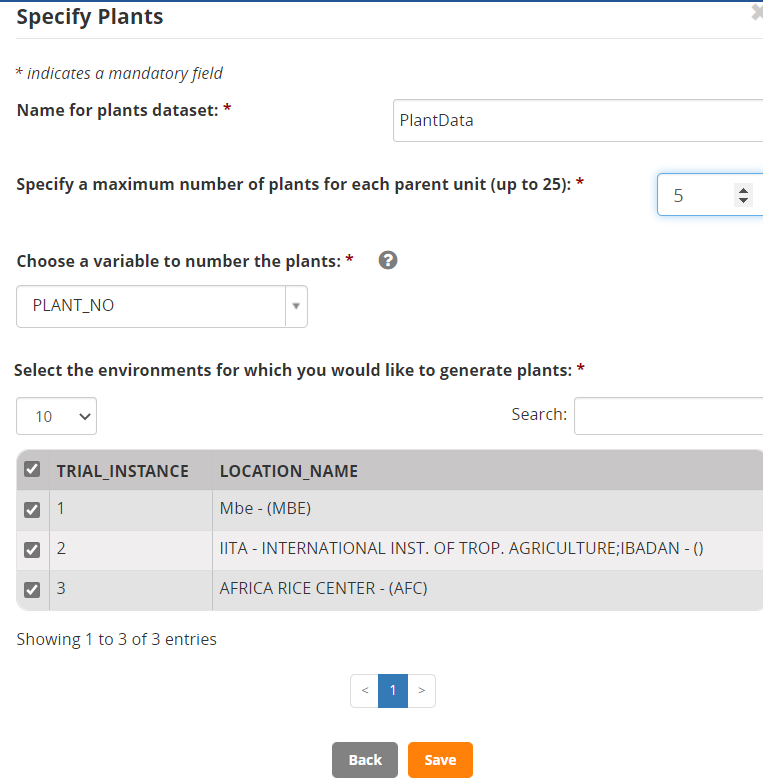
A new tab has been added to the study with one row for each sub-sample unit, indexed by Plant_NO within Plot.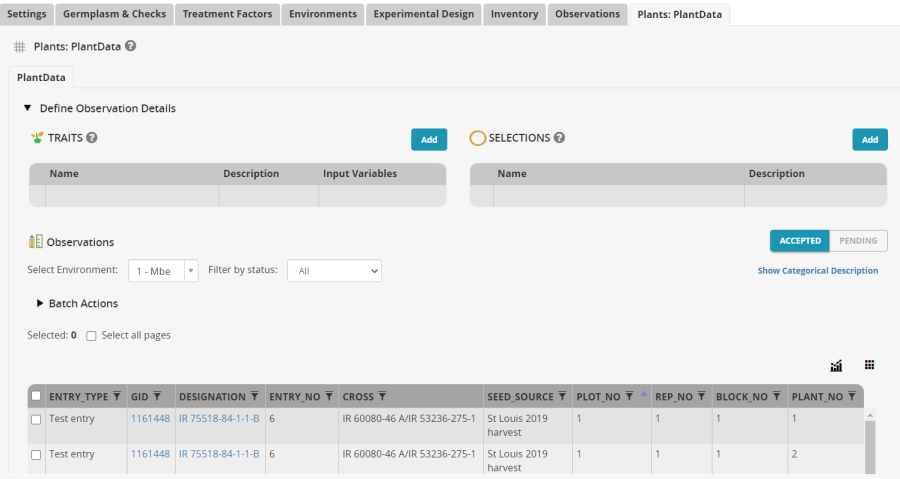
Now we need to add traits to be measured on the sampling units. Click Add opposite the Traits section and search for plant height, choose PLTHGT – Plant height at maturity, cm. This variable will be added to the PlantData observation tab.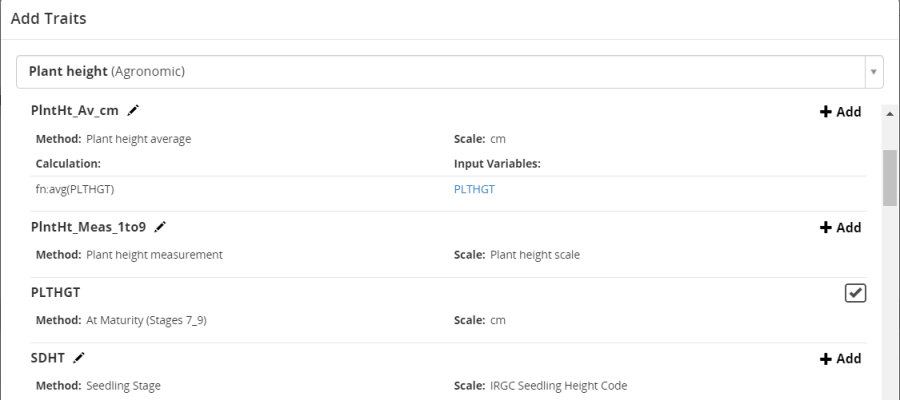
Now return to the Observation tab and add a new trait to the plot level observations - PlntHt_Av_cm;
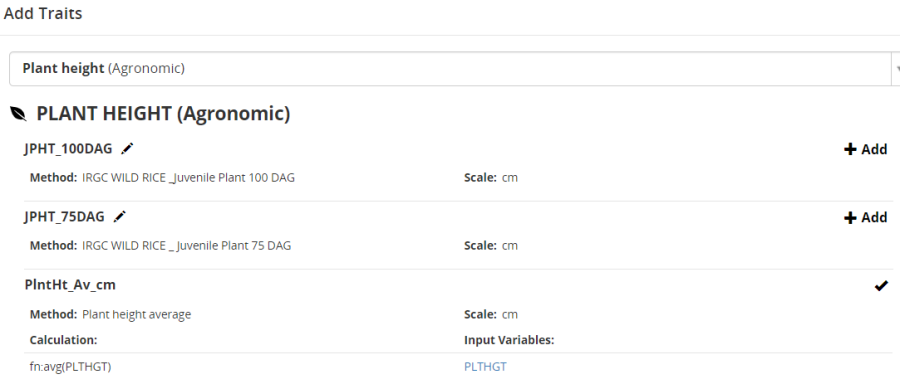
This variable has a formula – avg(PLTHGT) which we can used to average the sample plant values.
To collect the sub sample data you must export a study book for the sub sample dataset which we will do later.
Export the fieldbook, collect and load plot level data
Now we can suppose that the trials are all planted and so we can first fill on the SEEDING_DATE on the environments tab. Lets assume they were all planted around mid July.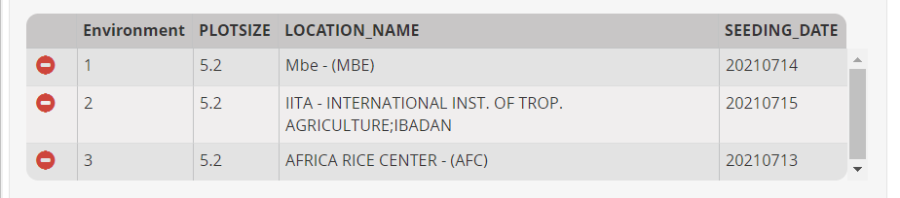
Now select Actions>Data collection options>Export study book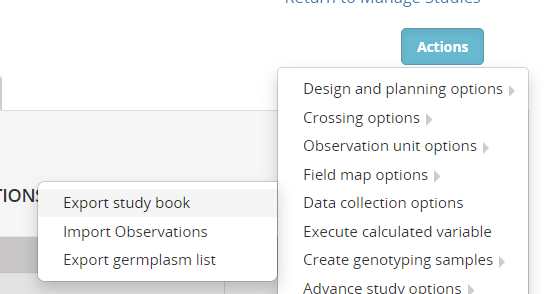
Select Observations for export, then select Excel for the export format and Plot Order and choose all environment for export. Click Export.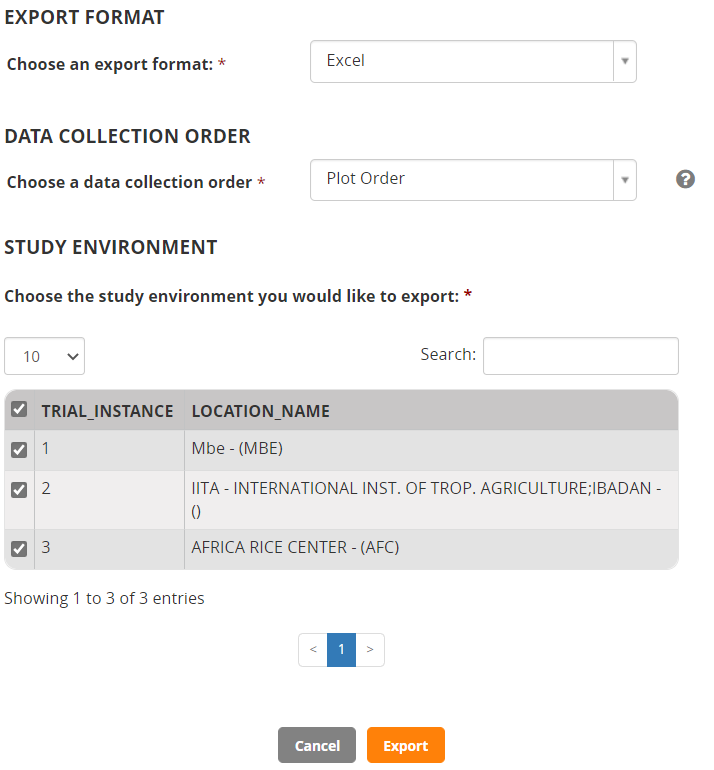
Three fieldbooks will be downloaded into a zip file. Extract the files from the zip and open the fieldbook for Mbe:
Each fieldbook has two sheets, a Description sheet which describes what is on the Observation sheet, and the Observation sheet which will contain the data.
Enter some plausible random data into the columns for FlwDate_50Flw_Date, GrYld_wgh_gplot, and GRMOIST. (Leave the other traits since these can be calculated by BMS).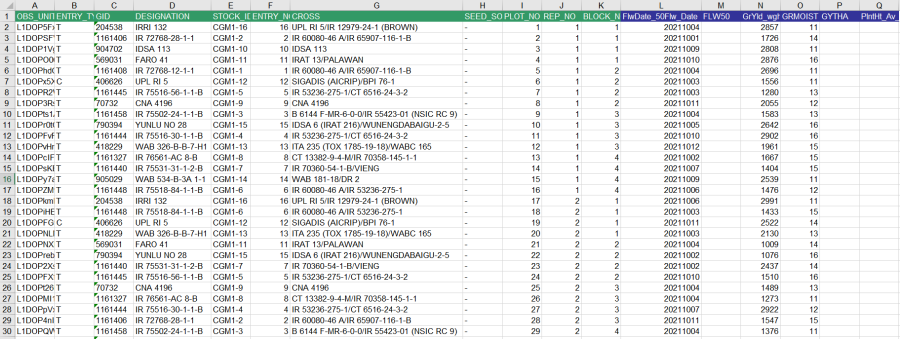
Save the fieldbook.
Select Actions>Data collection options>Import Observations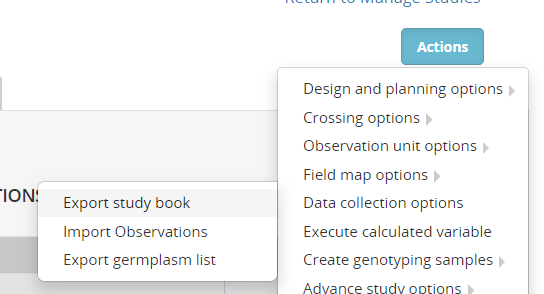
Click continue for Observations and then browse to the file just saved: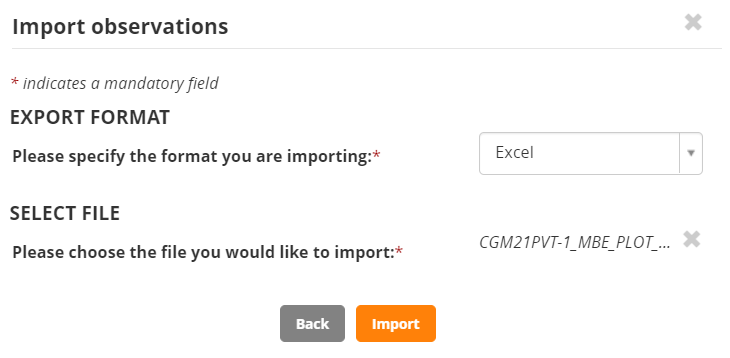
Click Import
(If you get a warning saying that you are trying to enter data for variables which are not in the dataset. Do you want to add them? Click NO to ignore it).
The data from the fieldbook will be moved into a staging area on the Observation sheet awaiting your approval.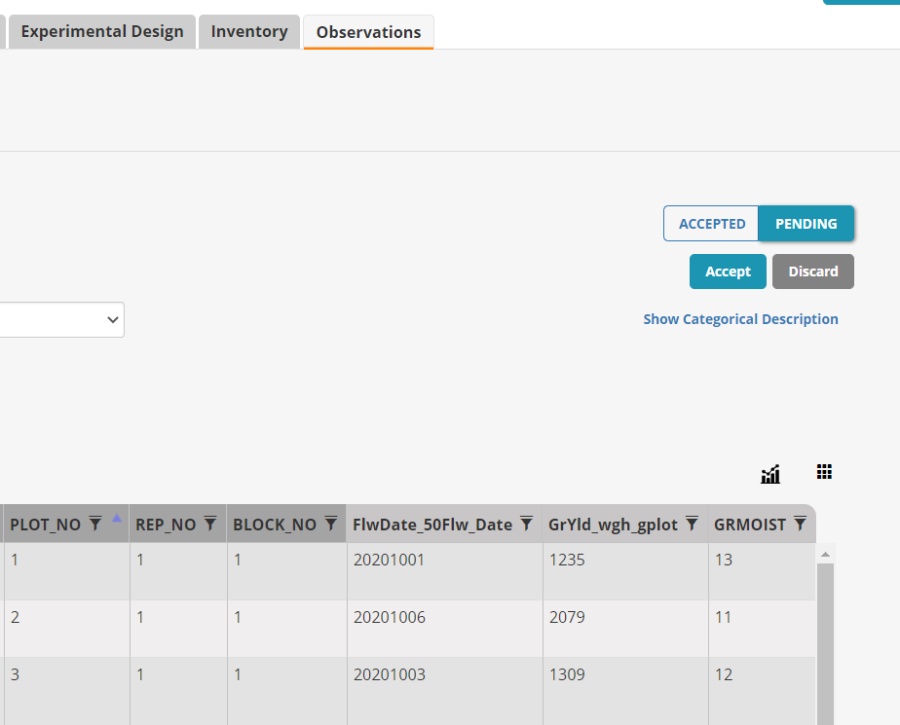
Any out of range data will be flagged and you can discard the whole dataset or correct the flagged entries. But if the data look good you click Accept and it is transferred into the study database.
Export a Studybook for the sub sample data and load the values
Since our study has a sub-sample dataset called PlantData we need to export a study book for this dataset and collect that data. Select Actions>Data collection options>Export studybook.
Then select the PlantData observation set for export: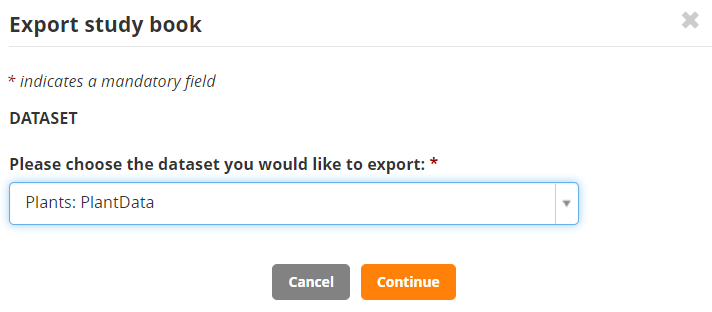
You can export as CSV, Excel or KSU formatted files. We will just export as Excel and just for location Mbe.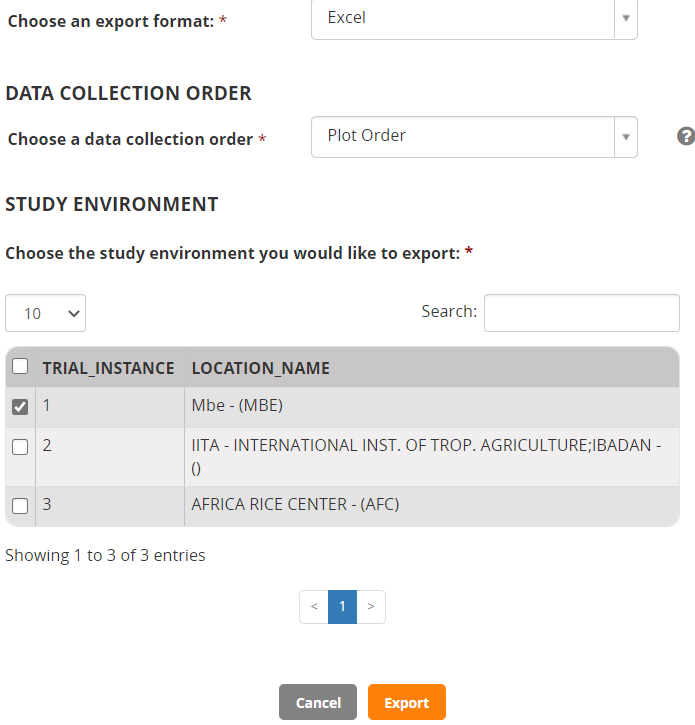
The study book is named with the Study, Location, Dataset- CGM20PVTa-1_MBE_PLANT_PlantData.xls.
Collect the plant height data: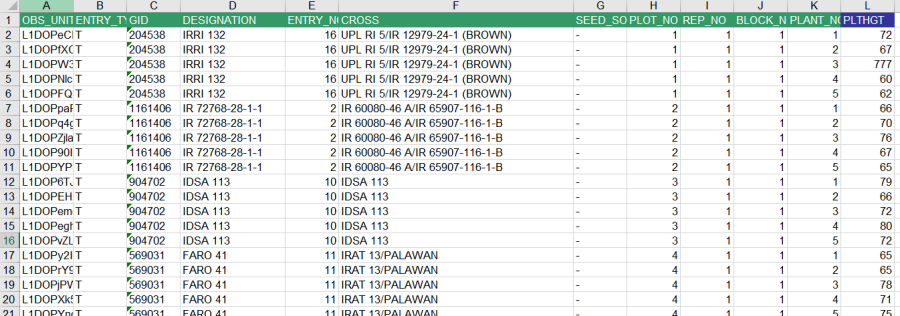
Import the data – Actions>Data collection options>Import observations. Then select the PlantData dateset.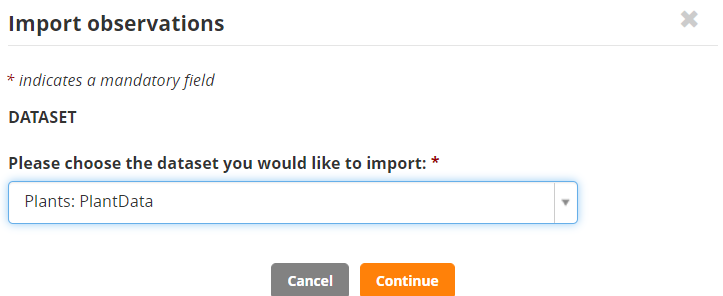
Browse to the file just saved - CGM21PVT-1_MBE_PLANT_PlantData.xls and click Import. The data is entered into a staging area waiting for review and approval. We see already one out of bounds values since limits have been set between 40 and 80 cm for PLTHGT.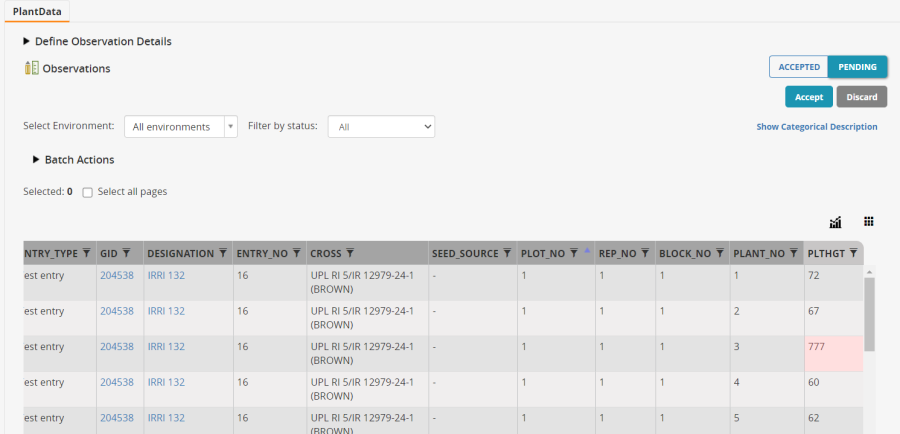
You can use the Filter by status box to filter to all out of bounds values and you will see there is only one in this set.
You can type in the cell with the out of bounds value and make it empty – a missing value. Then Accept the imported data.
Calculate derived variables
Once the data has been accepted you will see it in the full observations sheet with some variable headers in Green. These variables have associated formulae, and can be computed from the other data in the study. (Note they can also be read in from the excel spreadsheet if this is more convenient).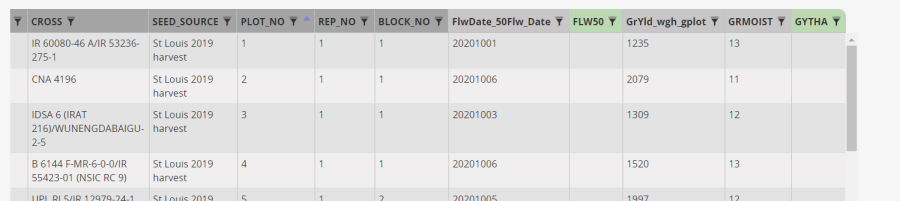
To calculate the flowering days, select Actions>Execute calculate variable. Continue with Observations, choose the flowering date variable (it may be called by the original name in the table) and select location Mbe, since this is the only one for which we have entered data. Click Execute, You will see that the day count between SEEDING_DATE and FlwDate_50Flw_Date has been calculated and stored in FLW50.
Repeat the calculation operation for the derived variable – GYTHA.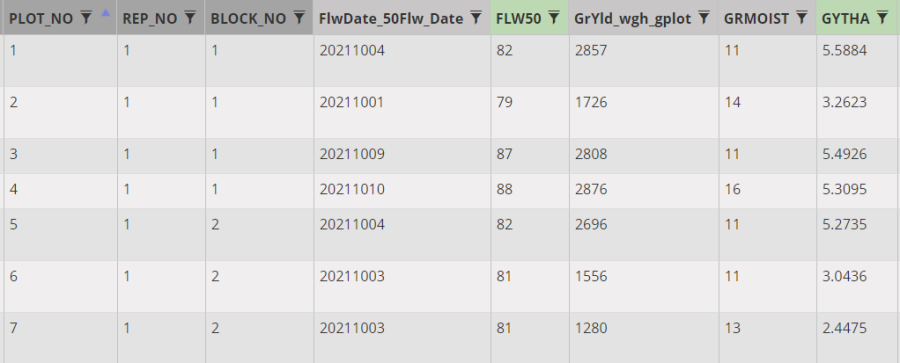
Now we also have a calculated variable for Plant height: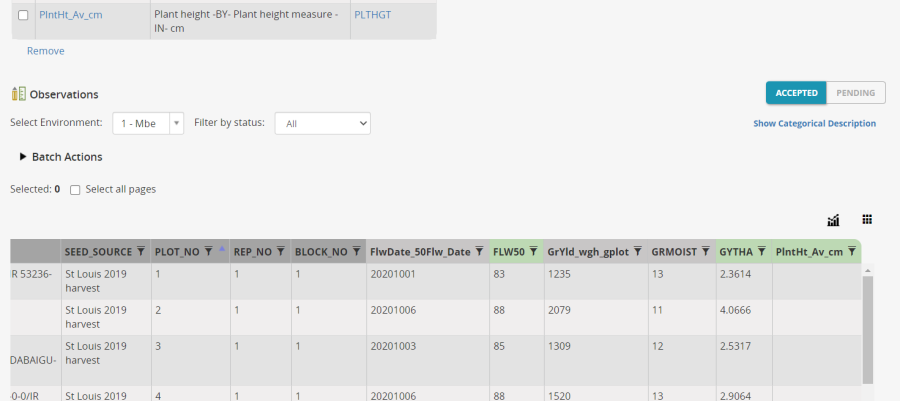
Select Actions>Execute calculate variable. Continue with Observations, choose the PlntHt_Av_cm variable and select location Mbe, since this is the only one for which we have entered data. 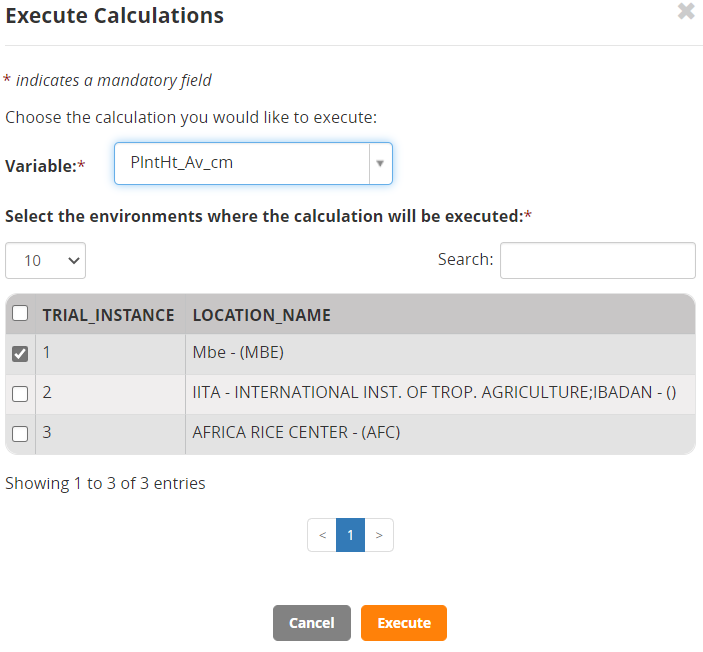
Click Execute.
The plant height averages have been filled in: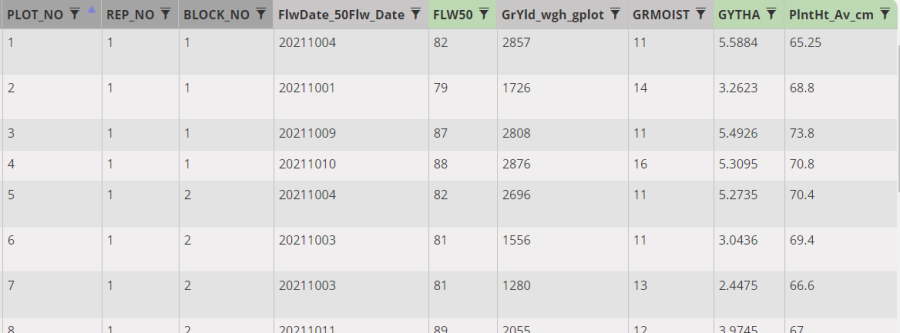
Notice that the first plot value is 65.25 which is the average of the four non-missing plants from that plot so it has been correctly adjusted for the missing plant value.
Return to the fieldbooks for the other two locations. Enter some data and calculate the computed variables.