v17 Managing Pedigree Nurseries
Pedigree nurseries are managed through a series of nurseries facilitated through the Study Manager.
Objectives
At the end of this tutorial, the user should be able to:
- Create a nursery study for population development
- Advance a pedigree nurseries by derivative methods
- Withdraw seed from inventory and prepare planting labels
Create an F1 Nursery
Open the Manage Studies application from the main menu and click on Start a new study. Name the nursery <your initials>21F1, CGM21F1 for me, and fill in the basic details of description and objective and select the study type Nursery.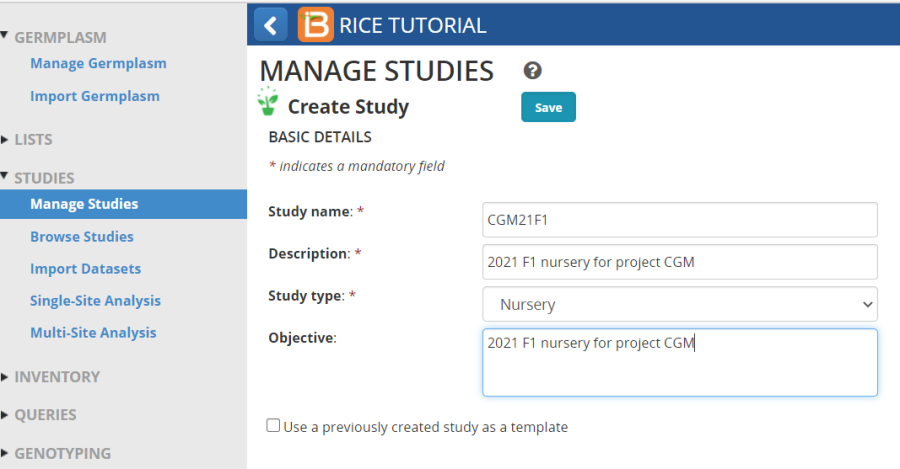
You can add variables to the new study directly from the Ontology pick lists as we did for the crossing block in a previous Tutorial, or you can pick up all the variables from any previously used study. To use this option check the Use a previously created study as a template check box. Then choose the previous study which is similar to your current study: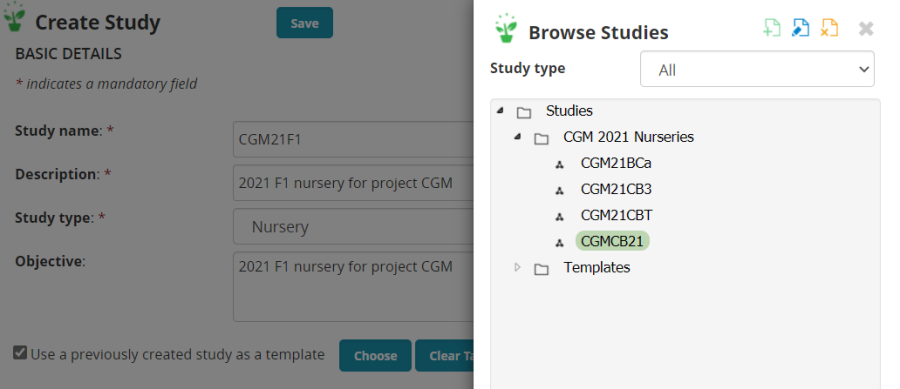
The variables from the template study are imported into the new study. Change the settings if needed.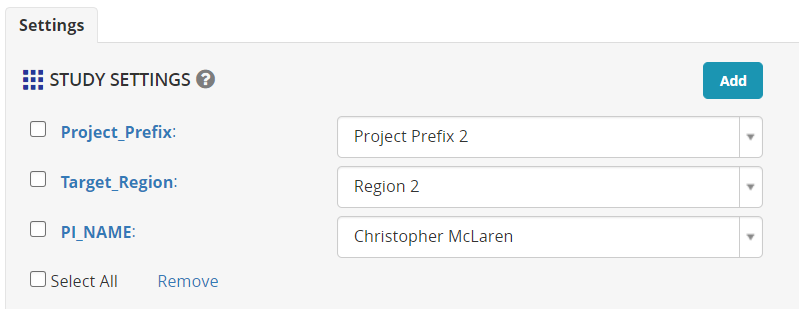
Save the study in your 2021 Nursery folder.
On the Germplasm and Checks tab, the extra variables for Cross and Seed source are also recovered from the template, so you just need to Browse for the list of planting material. The F1 list you made in the crossing Tutorial. U21CGMF1 in my case.
Mbe has been inherited from the template, and this location is still correct, but a new seeding date should be entered if known.
On the Experimental Design tab select Entry list order and Generate the design.
Advance the F1 Nursery by bulk selection of all families
Once the nursery is planted and harvested we can advance the families to F2 seed by bulking seed from each F1 cross family. Select Actions>Advance study options>Advance study: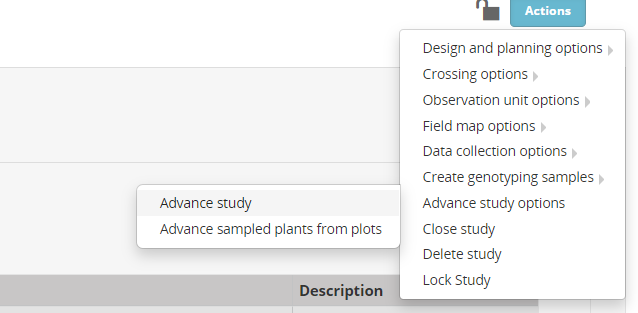
Choose the location to advance (we only have one), then select the advance method for all plots – Random Bulk - DRP. We will advance all plots so leave the All plots are selected checkbox ticked.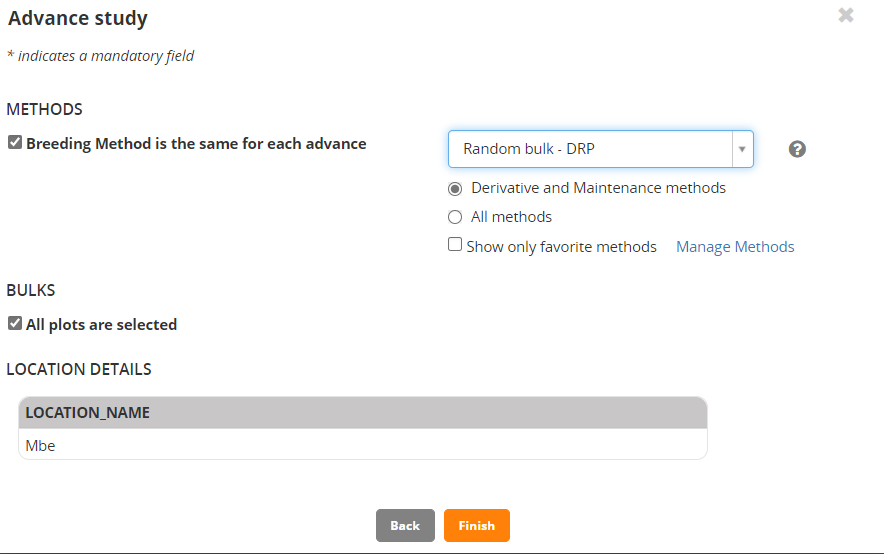
Click Finish.
Review the list of advanced lines, and if it looks correct, click Finish again.
Save the list with name <your initials>21F2 in your 2021 lists folder.
You can follow the steps in the tutorial Adding Inventory for a Harvest List to add inventory for the F2 seeds if you would like.
Create F2 nursery and load some data from a fieldbook
Follow the steps to create a new nursery for the F2 seeds. Use the F1 nursery as a template for planting at Mbe in Entry list order. (You can review the steps in the first section above). 
In this nursery we will need to add a variable to record the number of plants selected from each F2 population.
If flowering date is not a column in the Observation sheet, click Add opposite Traits and search for flowering and add FlwDate_50Flw_Date as a trait.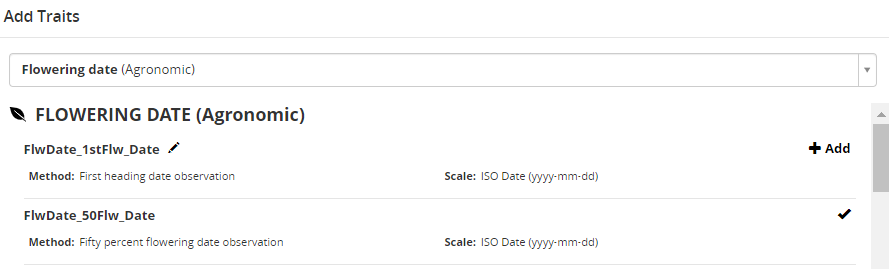
Click the Add button opposite SELECTIONS on the Observation tab and look for the variable NPSEL to add to the fieldbook.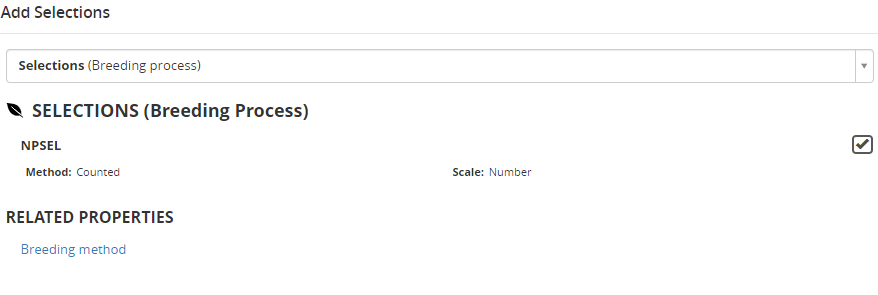
Now we can export the fieldbook for data collection. Select Actions>Data collection options>Export study book:
Choose Observations and then choose Excel Format.
You will download an excel fieldbook with a description sheet: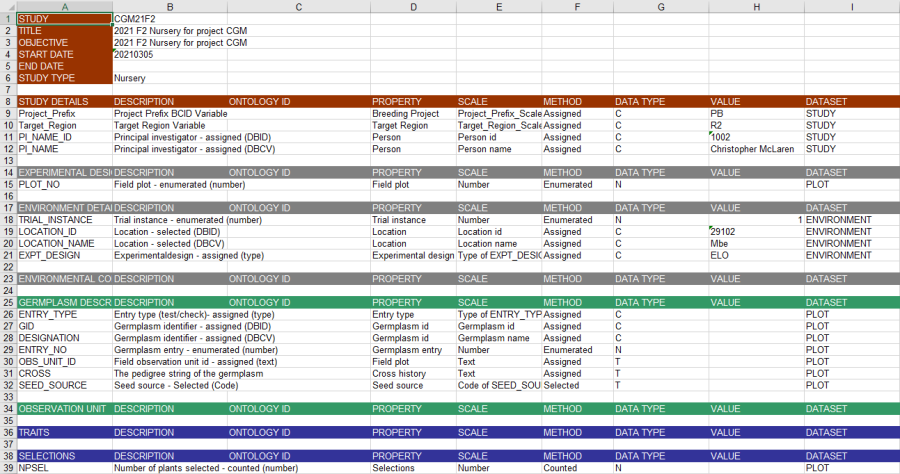
And an Observation Sheet. Fill in the data for the Flowering Date (dates are entered as numbers in format YYYMMDD) and the number of plants selected from each plot: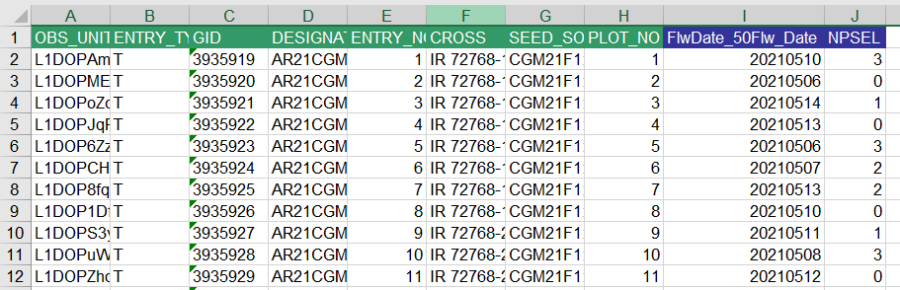
Back in BMS select Actions>Data collection options>Import observations. Press Continue for the observations sheet, then browse to the fieldbook file you just saved. When you have chosen the file click Import. The data will be imported into a staging area and the user is required to review it and accept it before it is saved into the study.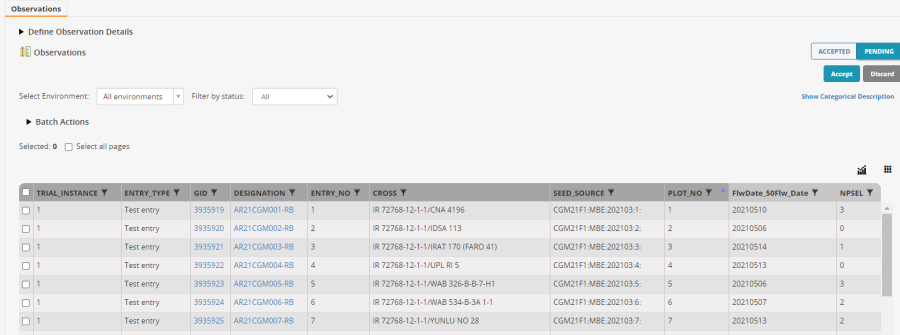
If the data looks correct, click Accept on the right of the observation tab. The data will be saved into the database.
Advance some F2 families by single plant selection
Now select Actions>Advance study options>Advance study: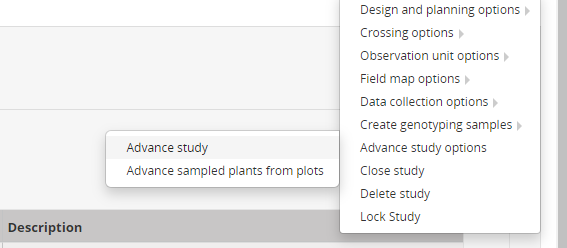
Click Continue to select the location, Mbe.
Choose the method Single Plant selection in the drop down box. Now this time we will not select the same number of lines from all plots, so uncheck that tickbox and then make sure that NPSEL is selected as the variable which defines the number of lines selected from each plot.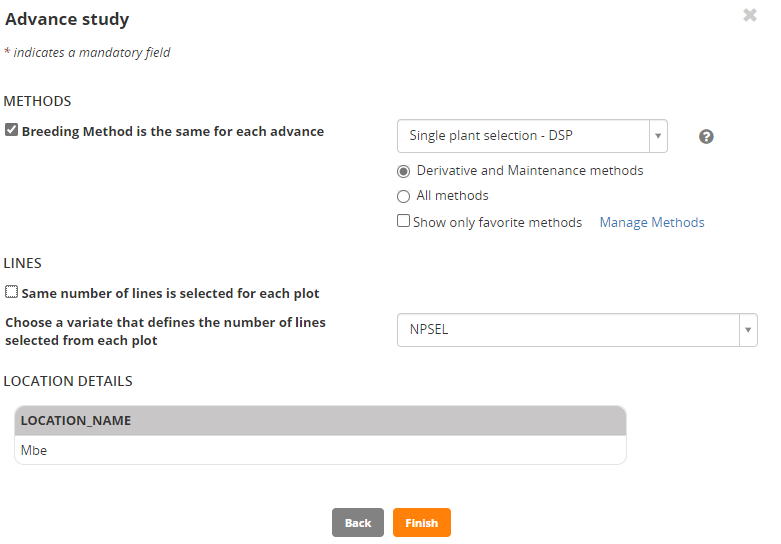
Click Finish.
Review the F3 lines and click Finish again then save the lines in an F3 list – CGM20F3 for me.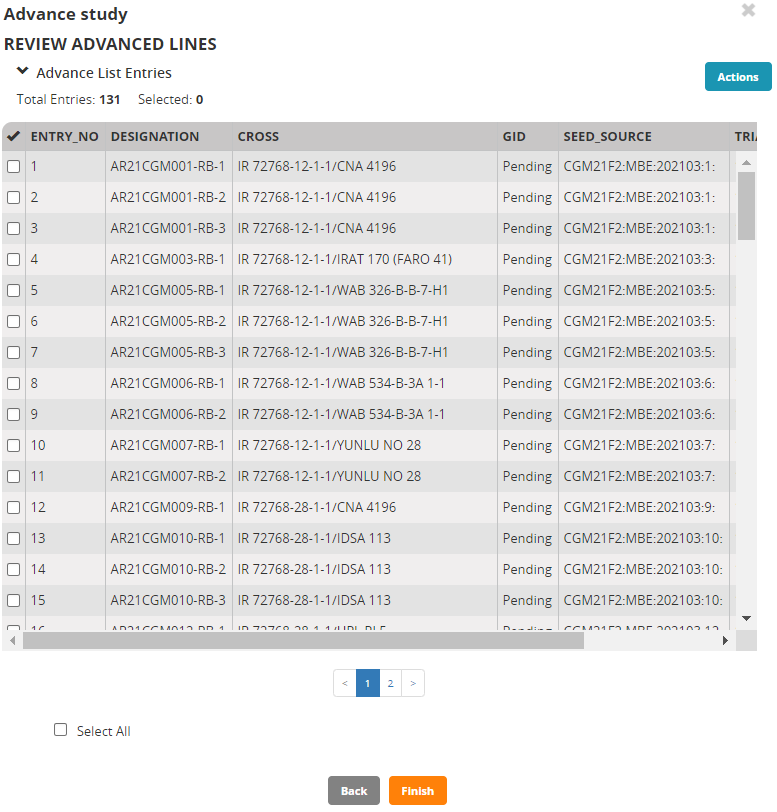
Save seed inventory for the F3 harvest list
We follow the steps in tutorial Adding Inventory for a Harvest List to save inventory for the F3 harvest list.
Open the F2 nursery (CGM21F2 for me) and on the Crosses and Selections tab select all the entries. 
From the Actions menu on the Crosses and Selections tab choose Create lots.
Fill in the Create Lot form with the Stock ID prefix (CGM for me), the storage location, and choose the units number of packets since we will not weigh the seed for each F3 line in this example. Since we know the number of packets, one for each line, and where they will be stored we can commit the inventory straight away by checking the Confirm transactions on saving check box. You can create labels for this inventory by following steps in the in tutorial Adding Inventory for a Harvest List. 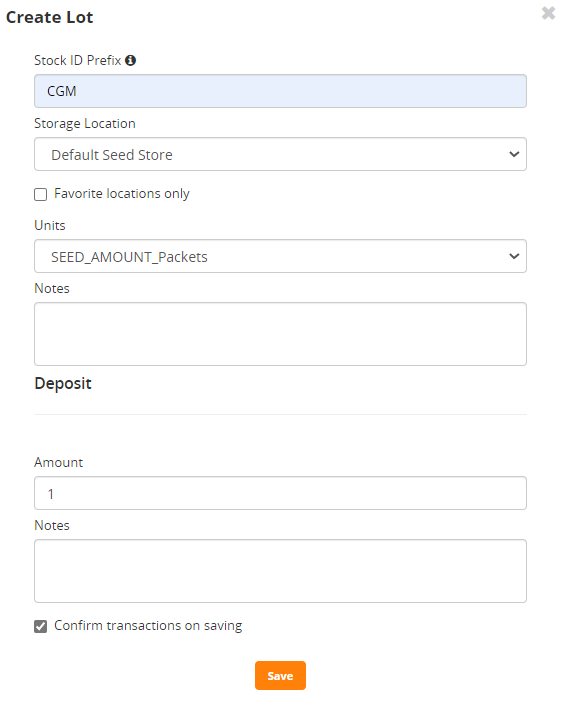
If you go to the list manager (LISTS>Germplasm Lists) and open the F3 list you can see the inventory:
Make an F3 Nursery with checks and Prepare seed for planting
For the F3 nursery we are going to add two check entries to the planting list and plant them alternately every ten plots. To do this we must add two entries to the F3 germplasm list.
In Manage Germplasm, search for exact matches to the name IR 64. Check the box next to the entry with GID 50533 (which should have 5kg of seed available if you did the earlier exercise). From the Actions menu select Add to existing list and select your F3 list (CGM21F3 for me) and click Add.
Do the same for NERICA4 (GID 765439).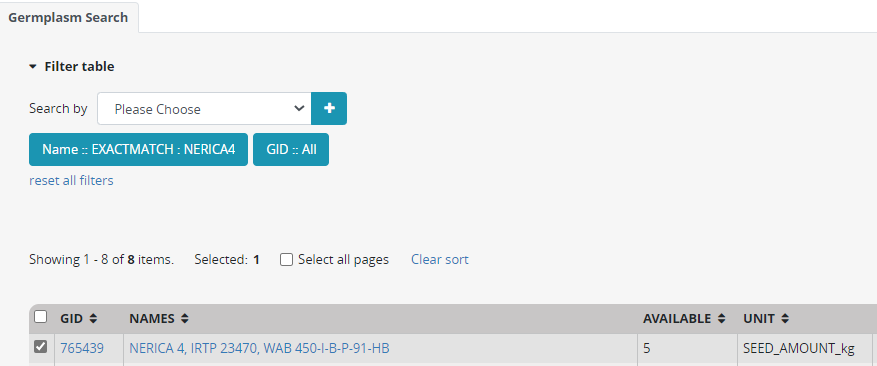
Now go to LISTS>Germplasm Lists and browse to your F3 list to verify that the two entries have been added.
Now Use the Study manager and follow the steps above to make an F3 nursery. I will call mine CGM21F3. Use the F2 nursery as a template. Load the F3 germplasm list for planting and specify the last two entries NERICA4 and IR64 as check entries. To do this scroll down the entries on the Germplasm and Checks tab, click on the Entry Type value for each of these entries, select Check entry from the list box and click the tick symbol: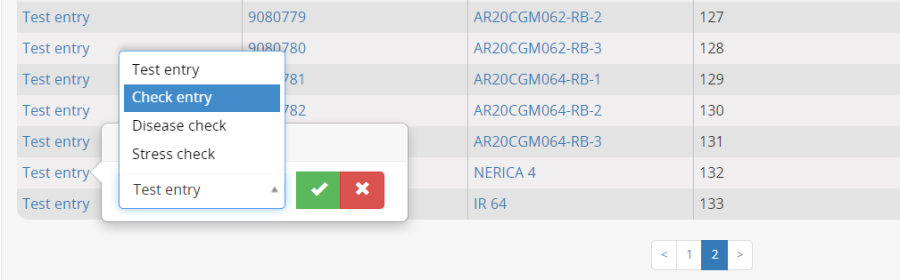
They will both be marked as Check Entries.
Next, click on the Experimental Design tab and select Entry list order. BMS detects that there are checks in the entry list and has added two boxes to the design details form. One asking the spacing between checks (ie how many test entries to place between checks) and the other asking whether all checks should be planted in each check position, or whether they could be placed one at a time in turn. We select 10 for spacing and Insert each check in turn. Click Generate Design.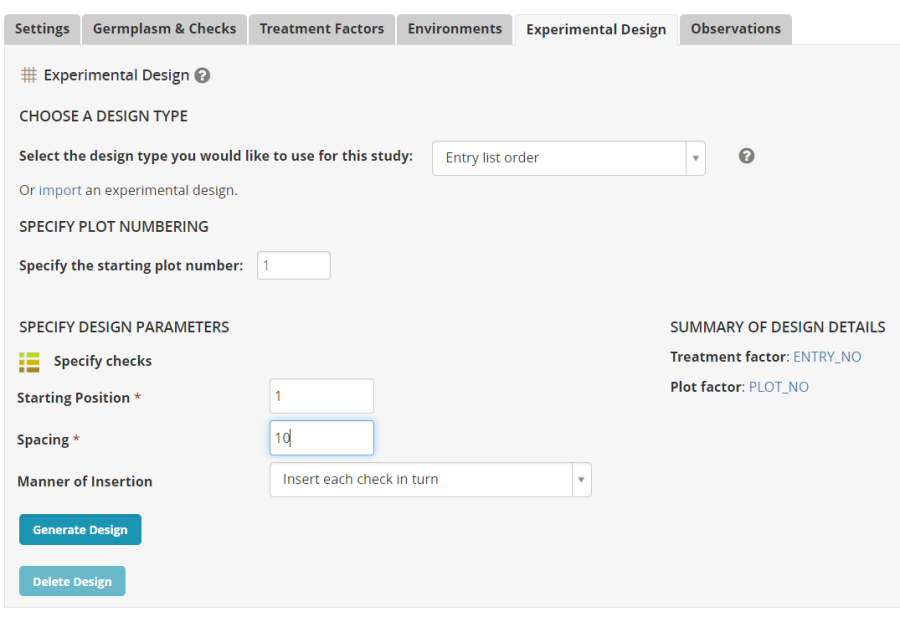
You will see on the observation sheet that every 10 plots is followed by one of the check entries: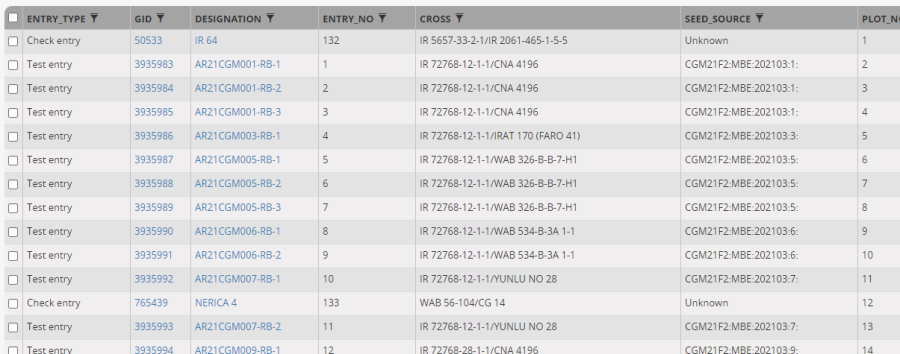
On the Observation tab add SELECTION variable NPSEL into the observation sheet. (Somehow it gets left off from the template).
Now to prepare seed for planting you must first specify the plots for which you wish to prepare seed. You do this by selecting observation units on the Observations tab. Since there is only one environment we only need to check the Select all pages check box to select the 145 plots in the nursery (131 test entries and 14 check plots):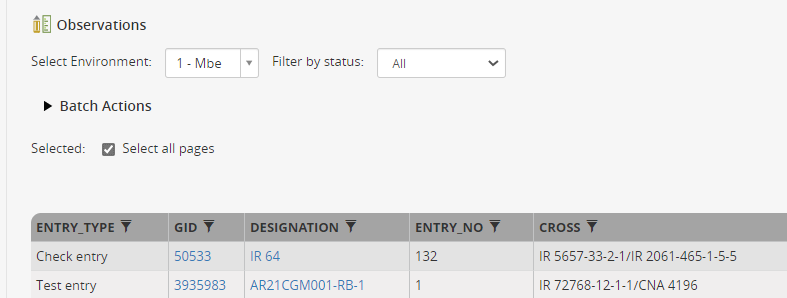
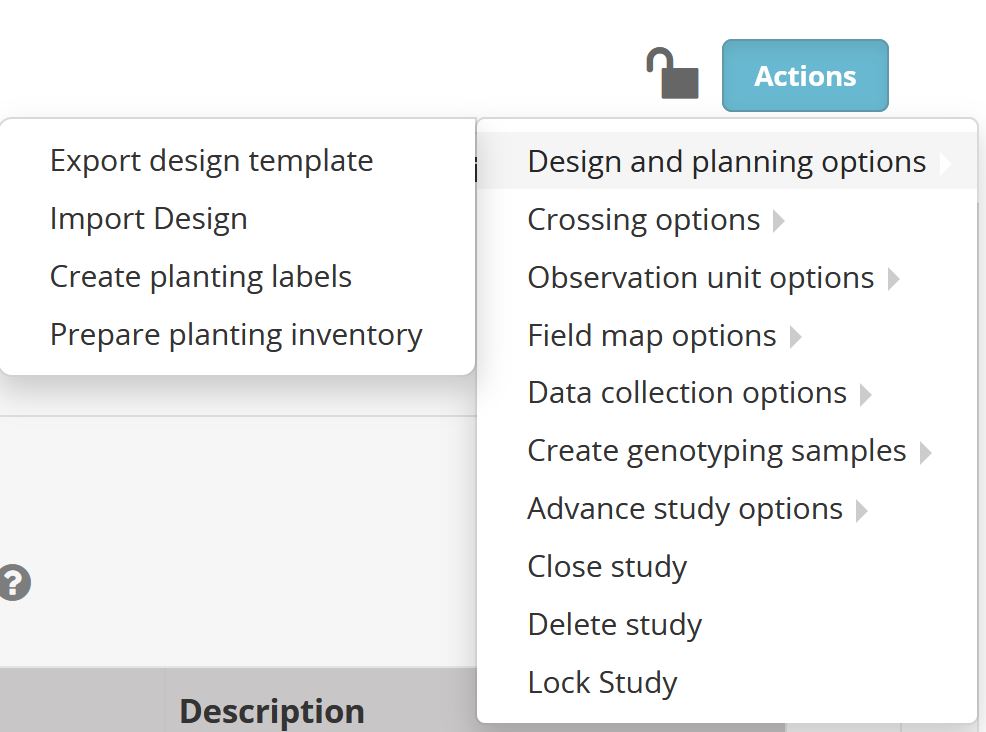
Next, select Actions> Design and planning options > Prepare planting inventory.
The Prepare inventory tab has a box for you to enter the amount of seed to be packaged for each planting packet and a table showing whether there is enough seed for each entry for all the plots in the trial. In our nursery we have one plot per test entry, and in our inventory we only have 1 bag per test entry, so we need to withdraw one bag for each test entry. We also have some bulk seed stored in kgs for the checks and we need to withdraw 20 g per packet for these entries. 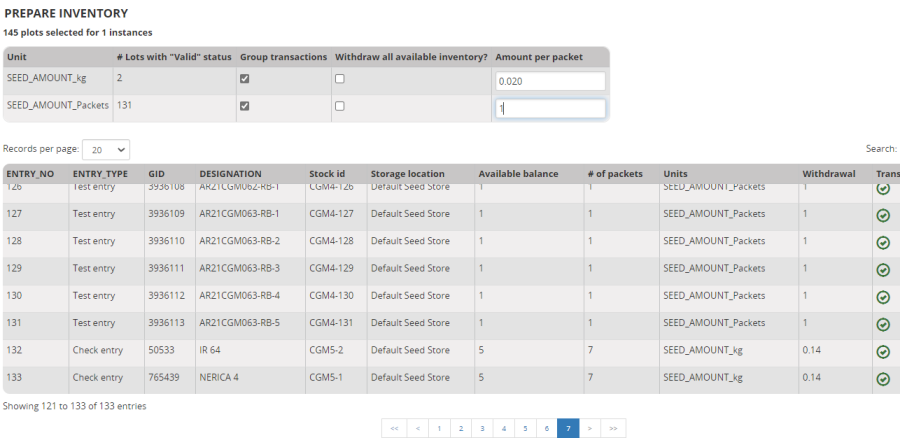
You can add some packing instructions, select Commit withdrawal on saving and click Confirm. 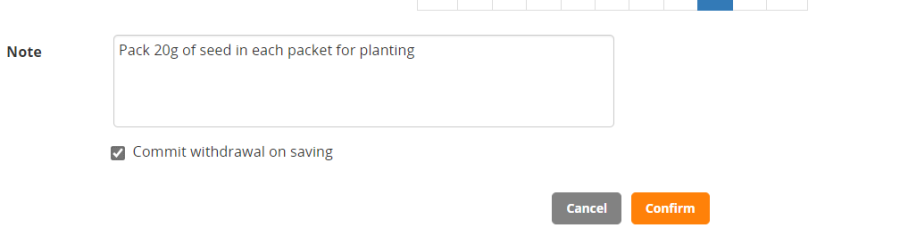
To prepare planting labels select Actions>Design and planning options>Create planting labels: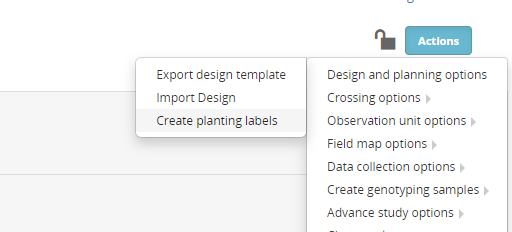
Select Observations and then select Formatted PDF label sheets for the output type: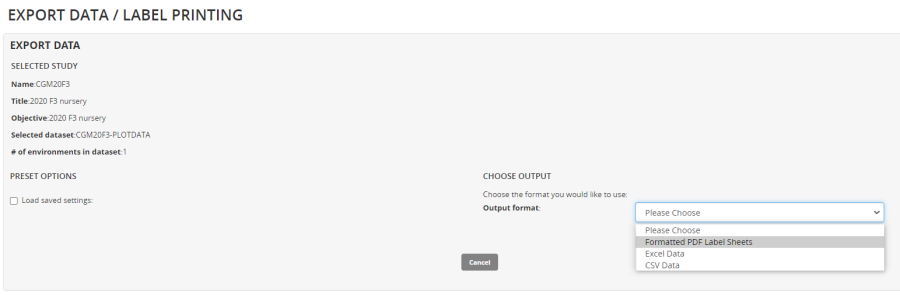
Drag Stock_id, DESIGNATION, Storage location abbr and ENTRY_NO to the left hand part of the label to indicate where to get the seed from, and then drag Study Name, LOCATION_NAME and PLOT_NO to the right hand part of the label to indicate where to plant the seed.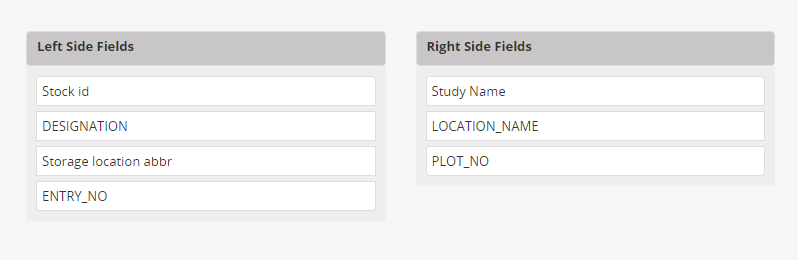
Click Export to export the labels in PDF format, and then Cancel to leave the label printer.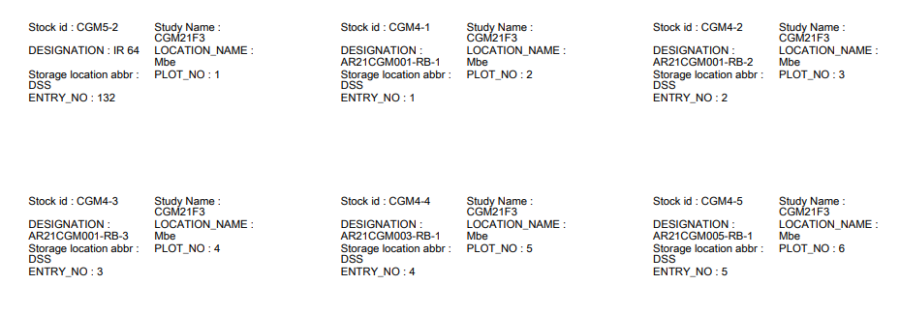
When the nursery is planted you can export the fieldbook and collect some data. Again the only trait is Flowering Date, and now the NPSEL column should be filled with 1 for families you want to keep as selected bulk F4 seeds, and 0 for families you want to discard.
Proceed to load the data and advance the nursery with Selected bulk method using the NPSEL variable.