v17 Importing germplasm and managing lists
One of the key advantages of using the BMS is that it facilitates the unique identification of germplasm and pedigree tracking. To start using the BMS, however, lists of current germplasm from your breeding program should be entered into the database. These lists are ideally imported with complete pedigrees. However, for this exercise, we will consider the simple import of existing lists without pedigrees.
Once germplasm are imported into the database it is often necessary to make lists of germplasm for different purposes such as planting, shipment and testing. These germplasm lists are created by selecting entries from previous lists and adding the imported lines. Other new lists are made from harvest actions from nurseries and trials.
Objectives
At the end of this chapter, the user should be able to:
- Complete a template with germplasm names to be imported.
- Import germplasm into the database from a template (without pedigrees).
- Add inventory for imported germplasm
- Select lines from an existing list and add them to a new list of germplasm.
Importing a list of germplasm from a template file.
Creating a basic germplasm list in Excel
Lists of germplasm can be entered into the system using an excel file. This file must follow a specific format so a template has been provided. Users with appropriate permission will see the action Import Germplasm on the GERMPLASM main menu. If you click on this item you will see that you can download a template (red box):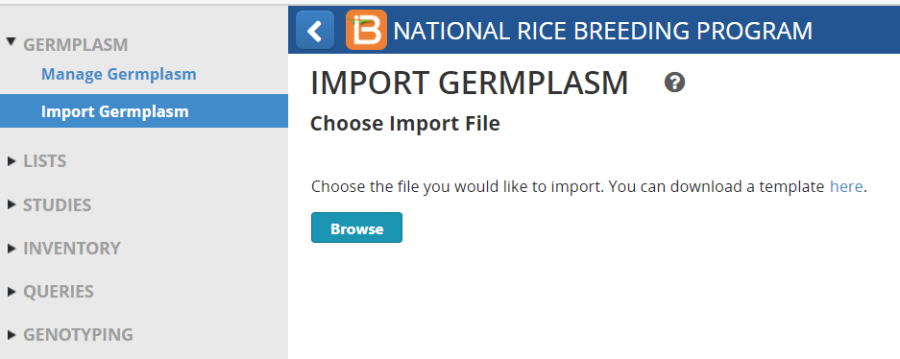
Each template has three sheets, a description sheet where some meta-data can be added, and which describes the columns on the observation sheet where the germplasm details are supplied. There is also a Codes sheet where some metadata codes are available.
Use Excel to modify the germplasm import template and create a file with the following format and minimum content:
a) the Description sheet should look like this (some details filled in rows 1 to 4). The first row, cell B1 contains a name that will be given to the list. You should customize this by entering <Your initials>GI21. You should prefix with your initials because list names must be unique and if several students in the same program use the same name there will be a clash.
b) The Observation sheet should look like this (minimum requirement – entry no and name):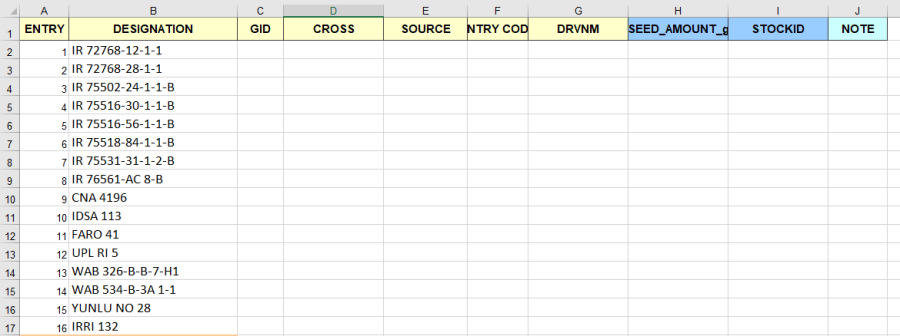
Create a file exactly as shown in the image above and save it as BMSGI20.xls
1 | IR 72768-12-1-1 |
2 | IR 72768-28-1-1 |
3 | IR 75502-24-1-1-B |
4 | IR 75516-30-1-1-B |
5 | IR 75516-56-1-1-B |
6 | IR 75518-84-1-1-B |
7 | IR 75531-31-1-2-B |
8 | IR 76561-AC 8-B |
9 | CNA 4196 |
10 | IDSA 113 |
11 | FARO 41 |
12 | UPL RI 5 |
13 | WAB 326-B-B-7-H1 |
14 | WAB 534-B-3A 1-1 |
15 | YUNLU NO 28 |
16 | IRRI 132 |
To save typing you may be able to copy the names from the above table. 
Importing the list. Once the template is completed open the Import Germplasm form from the GERMPLASM menu.
Click Browse and search for the completed template.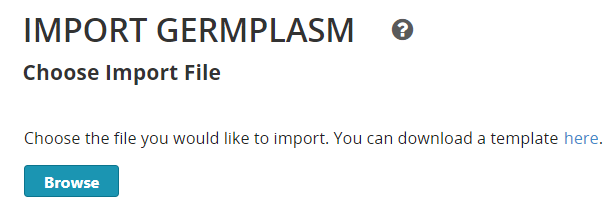
Browse to the location where you stored the completed template file CGMGI21.xls. Click 'Open'. 
Once you have selected the file, click Open.
A message appears indicating a successful upload. Click 'Next'.
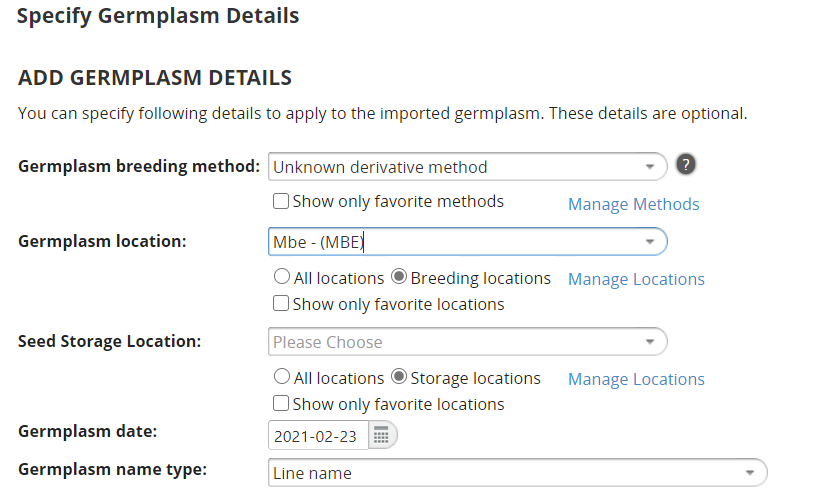
The Specify the Germplasm Details form appears. This form allows you to specify some information which will be applied to all the unknown entries in the list.
- The first is the method by which the lines were produced in their last generation. Set this to Unknown derivative method by starting to type un in the box and selecting the result.
- The second is the location where the germplasm was obtained or harvested,
- The third is a storage location where seeds will be stored. Since we have not specified any inventoy with this list we can leave this blank,
- The fourth is a date that the germplasm was harvested or acquired,
- And finally you can specify the type of name given in the designation – this is defaulted to Line name.
A preview of the germplasm you intend to import follows next:
If this does not look correct, click Cancel and check the template.
Finally you must specify how germplasm identifiers should be assigned to germplasm where the names are found already existing in the database: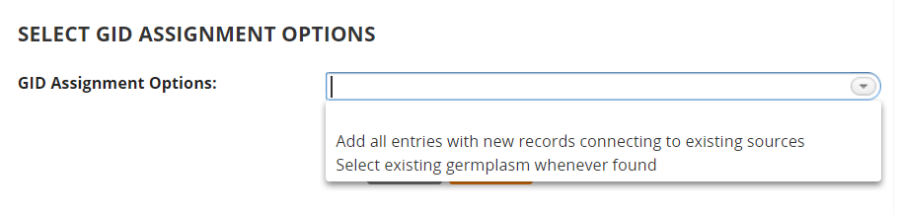
You should almost always choose Select existing germplasm whenever found unless you know the germplasm to be new to the system. Failure to make this selection can result in many duplicate entries being created for a single germplasm and this makes data integration for that line very difficult.
Once you have made this selection, Click 'Next'.
There is a checkbox to select single hits whenever found and this is checked by default, but if you prefer to check every match you can uncheck this box. IF there are multiple matches the user must select the most appropriate. For this example select the existing germplasms in the database where the Location is International Rice Testing Program and IRTP {number} as one of its names. Click to highlight the germplasm, select use this match for other instances and click Continue.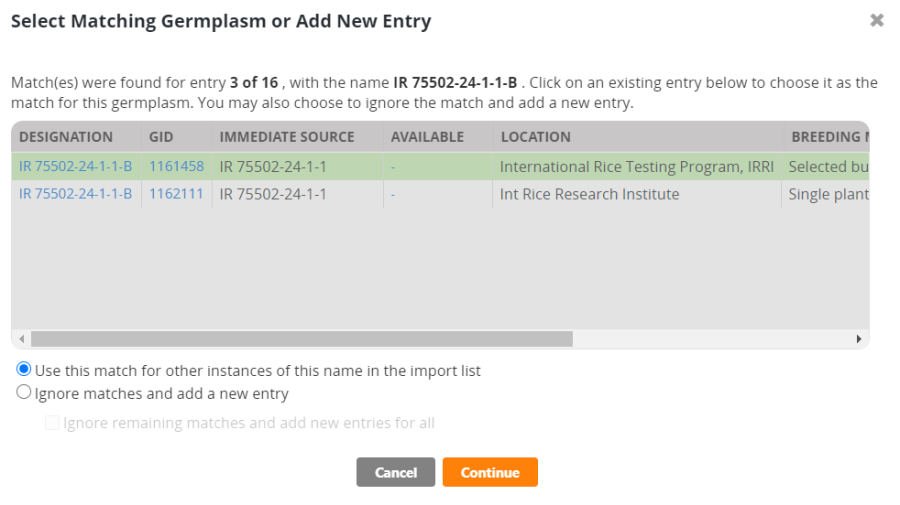
When all the entries have been processed BMS will open the Save List page. This section has picked up details about the list from the description sheet of the template file which you can change if you like.
You can make a folder for your current lists (if the right one does not exist already) by clicking on the + symbol and enter <Your initials> 2021 Lists for example. Again use your initials to keep your lists separate from other students. Then click the tick and the folder will be created. The List name should also have your initials so that it is different from list stored by other students. Then click Save. 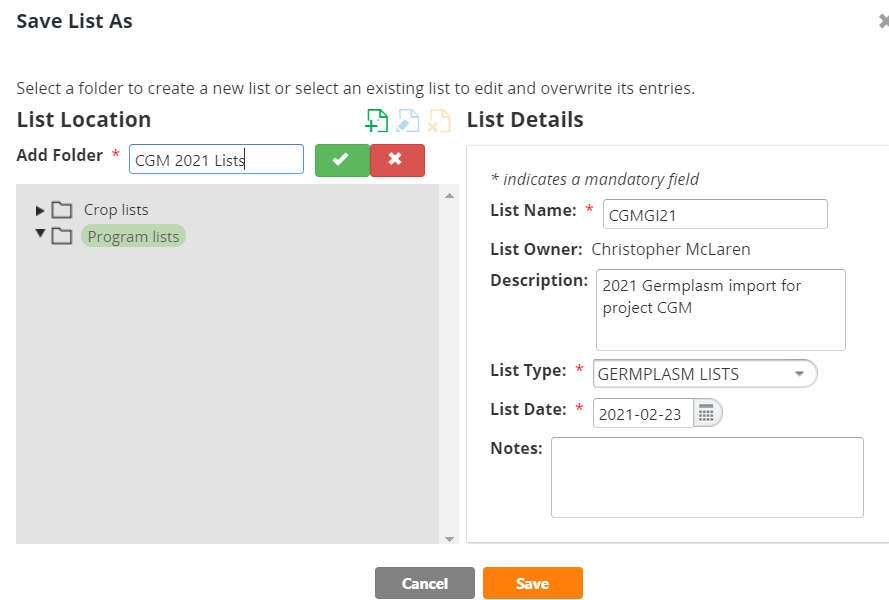
A message appears that the list has been saved. After which, the newly created list is opened. Click the Germplasm List Data to view the entries. 
Viewing Lists
To view any list of germplasm, such as the one just imported, click on Germplasm Lists under the LISTS main menu.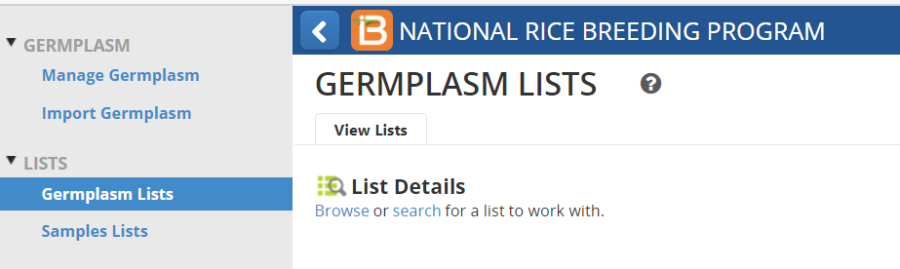
Then click on Browse and navigate to the folder where your list is located and highlight the list you want to view. (You can navigate and highlight several lists). Then click the X at the top right of the navigation box to clear it and you will see the lists you highlighted in separate tabs.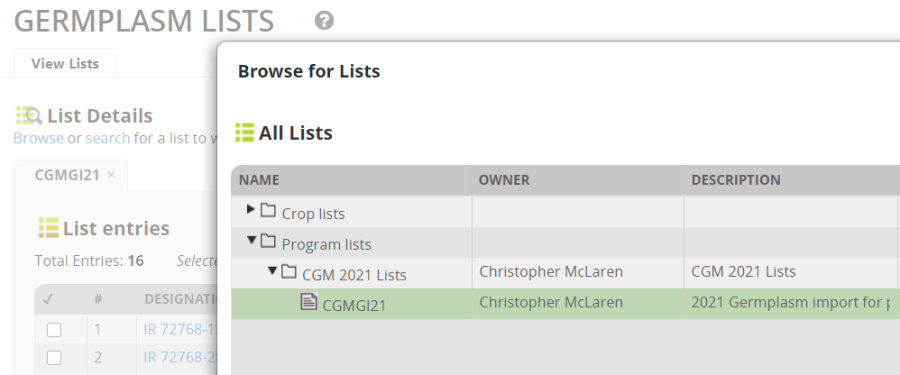
Adding Inventory for Imported Germplasm
Although seed inventory can be added to the seed inventory system by filling the inventory columns on the germplasm import template, it is better to use the inventory functions for the List Manager and the Inventory Manager to do this since this offers more control of how inventory are stored and provides access to a unique LotID which can be used to bar code the seed packets.
To add inventory for the imported list, open the list in the List manager, select all entries in the list and then select Actions>Create inventory lots: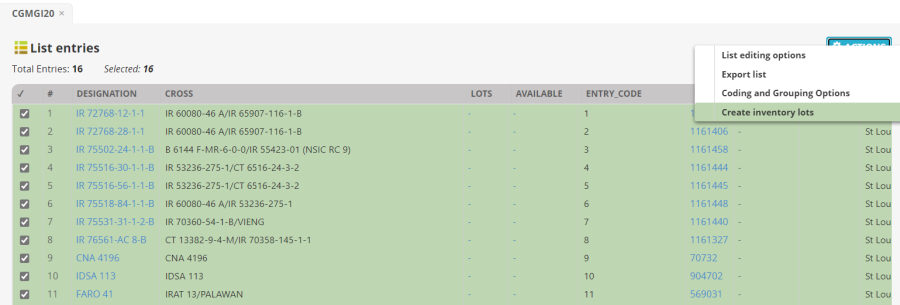
On the create lots form you must enter a stock ID prefix which should identify the 'owner' or project to which the seed lot belongs. This will be extended by adding a batch number for the seed batch and an entry number for the particular line. It is useful to store the seed packets in order of stockID at the seed storage location for easy retrieval. Enter your initials for this example to keep track of your seed stocks.
Next select the storage location – we only have a location called the Default Seed Store, but of course other locations can be added as appropriate. Choose the scale in which the seed will be managed and enter a note if desired.
Now we can also add an initial deposit at this time, and if, for example, the sender had sent the same amount of seed for each entry you can enter that here and confirm the transactions directly.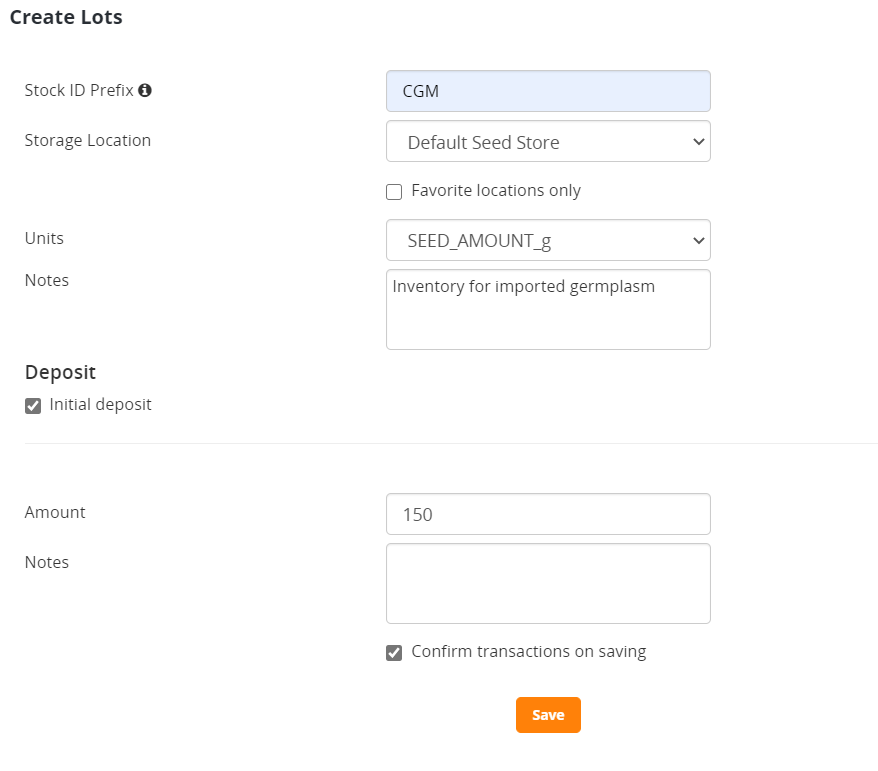
Click save and you will get a message that the lots have been created.
Reload the germplasm list to see the inventory: 
Manipulating Germplasm Lists in the List Manager
View existing Program Lists
From LISTS go to Germplasm Lists, Browse Program lists><your initials>2021 Lists and highlight the list just entered <your initials>GI21 (CGMGI21 for me).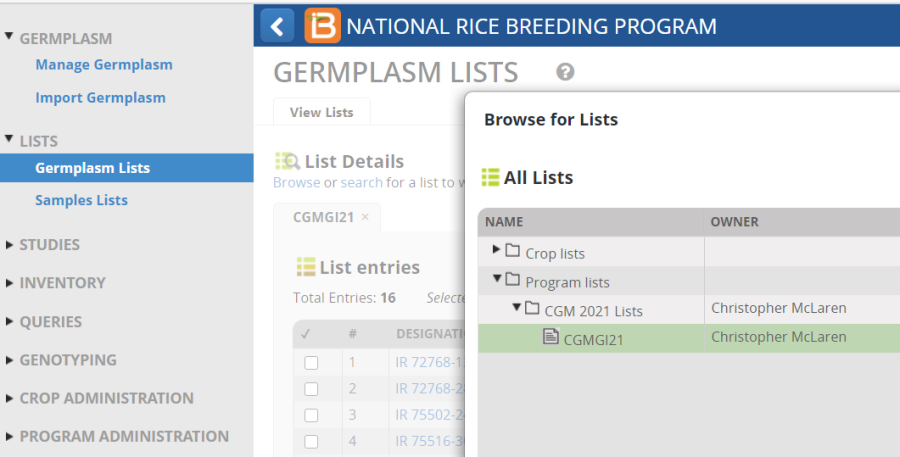
Clear the Browse for Lists panel by clicking on the x in the upper right corner and you will see the list just entered:
Right click on the header of the Cross column and click Fill with Cross expansion. Select 1 level. Because all the entries were selected from the database, they do have pedigrees which are displayed in the Cross column: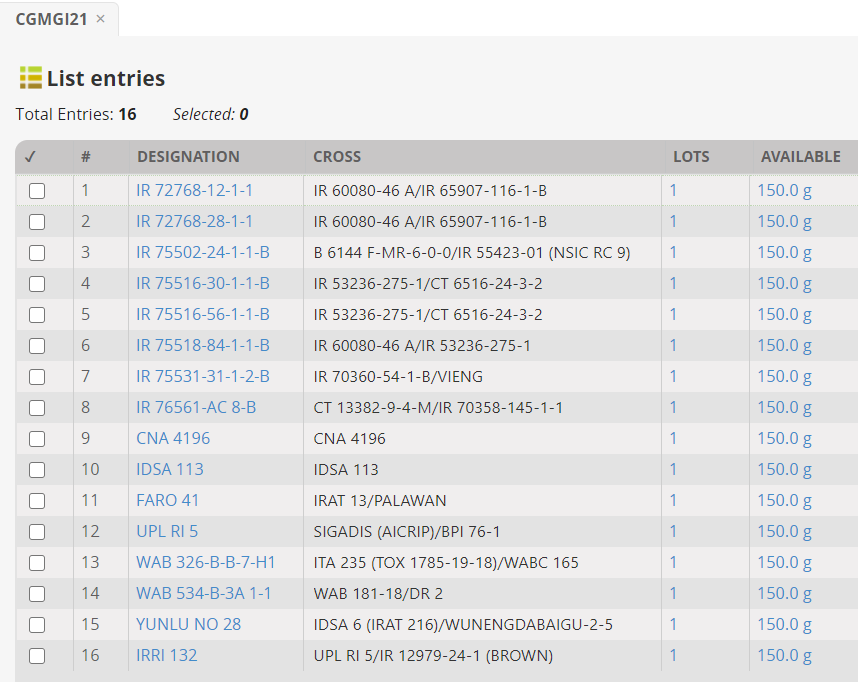
If no cross information is available, the Designation is simply displayed in the cross column.
Click Actions>List Editing Options>Save changes to save the pedigree in the list.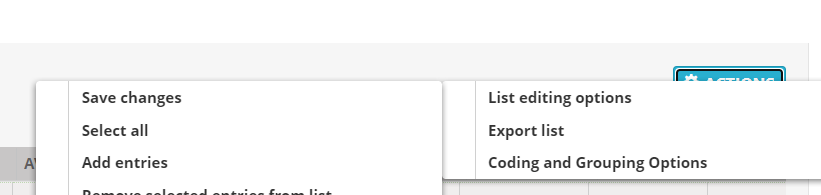
Using Crop Lists to share germplasm between programs
Click on Browse below the heading List Details and expand the Crop Lists section.
Lists saved to or moved to the Crop Lists section are visible to all programs in the crop. Navigate to INGER NURSERIES>IRLYN-E and highlight list IRLYN-E-1993. You can see this list because it is in the Crop Lists section even though it was not made in the current program. You cannot do much with this list until you copy it into your Program Lists.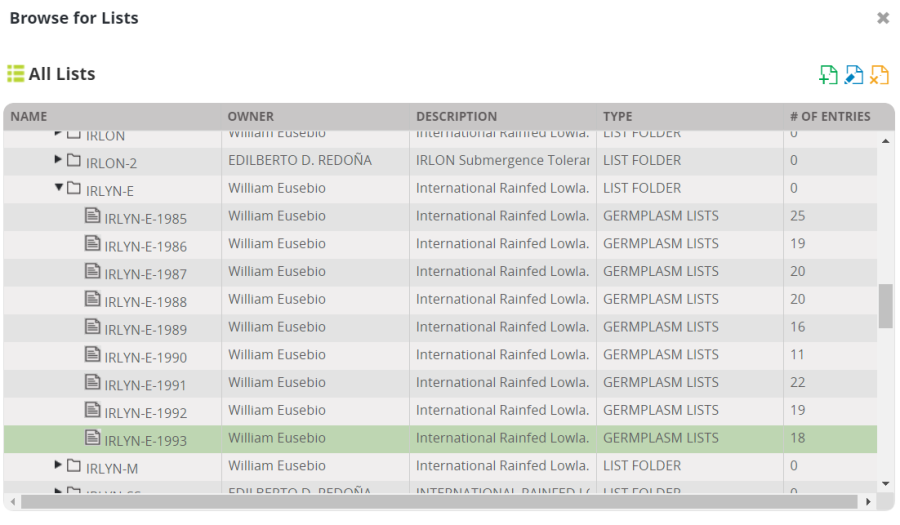
The list contains 18 entries: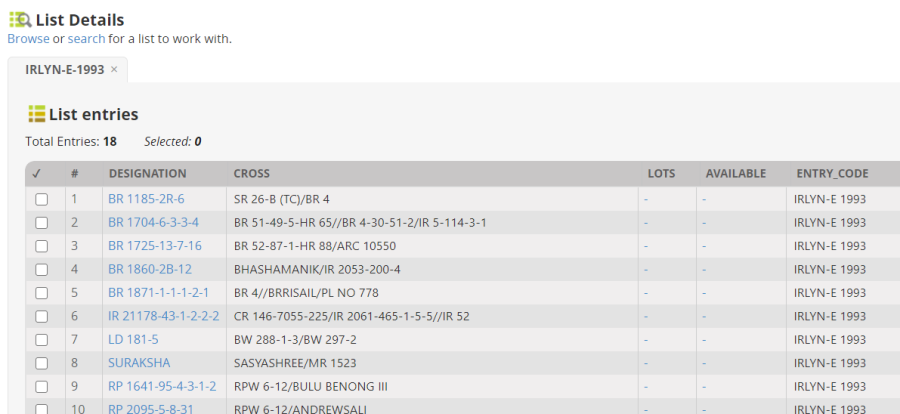
Highlight all the entries by clicking on select all at the bottom left of the list. Right click on the green space and click Add Selected Entries to New List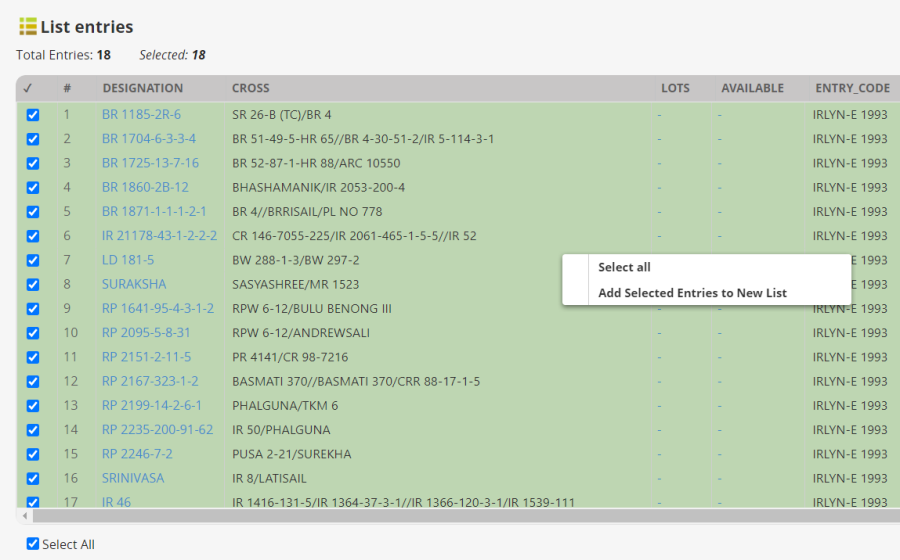
The List editor will open with the entries in a new list. Choose Actions>List Editing Options and save the list in the 2020 Lists folder with name :<your initials>21PVT (CGM201PVT for me).
Now in Browse Lists Program Lists> <Your initials>2021 Lists we have a second list: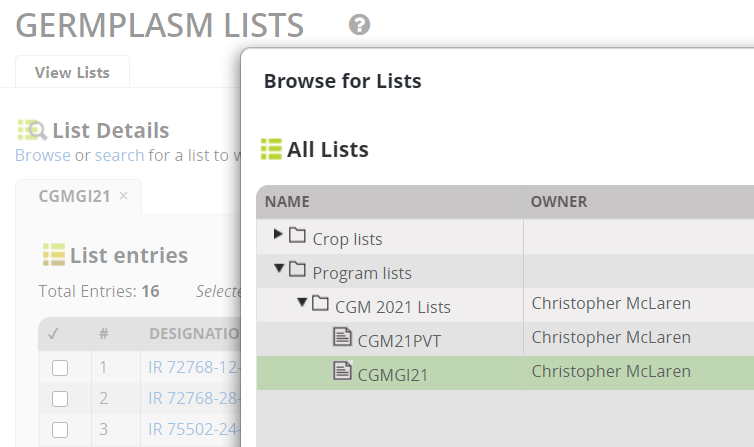
Adding Entries from an existing list to another list
Suppose I wish to add two entries from my import list (<your initials>GI21) to my PVT list to be checks for example.
From Browse Lists open the PVT list and select Actions>List Editing options>Edit list.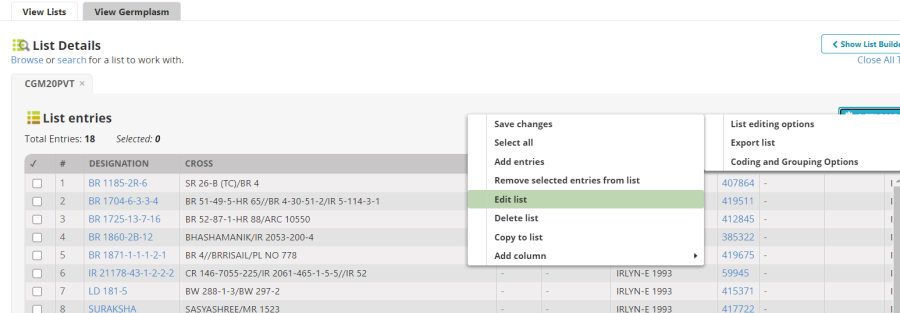
The list will open in the Edit list box to the right. Then click Browse again and select the import list (<your initials>GI21). It will open in the Browse list box on the left.
Select two germplasm FARO 41 and UPL RI 5 by checking the tick boxes to the left of the germplasm names. Right click on the green space and select Add Selected Entries to New List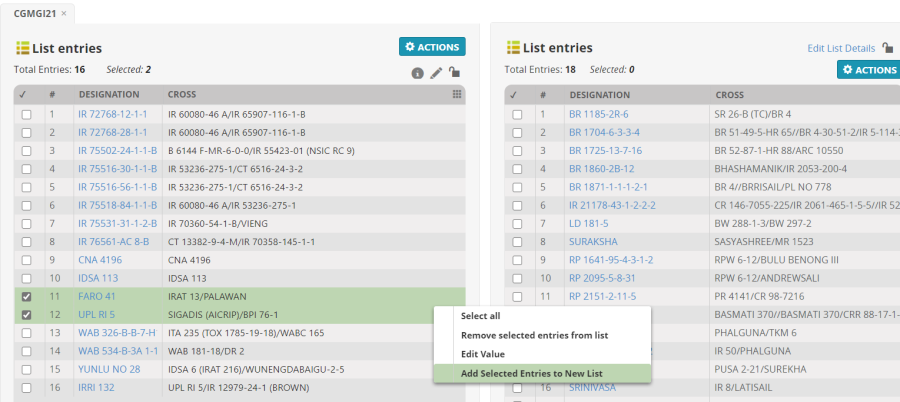
You will see that the selected entries have been added to the end of the list in the Edit Window.
Save the changes.
Adding Entries from the Germplasm Search to a list
You can also add germplasm to lists using the Actions menu items from the Germplasm Search Application: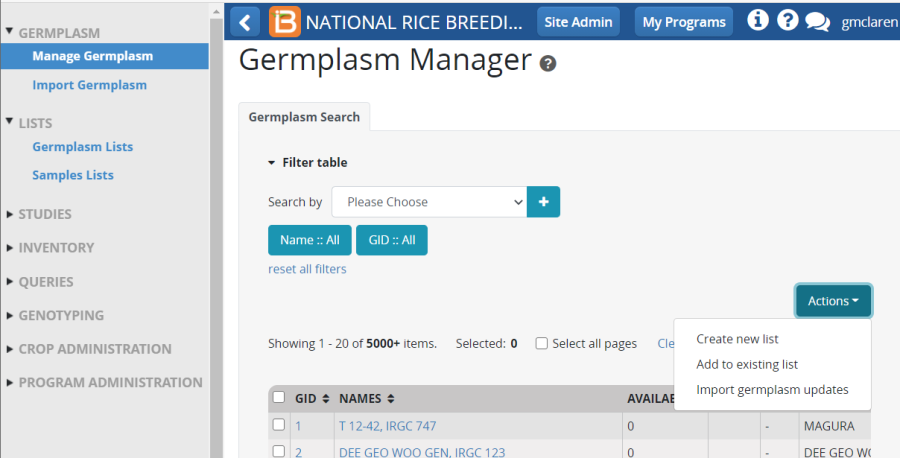
If you highlight entries in the filter list and click the Create new list action item you will be asked to save a new list with those entries added. If you click the Add to existing list item, you will be asked to choose a list and the checked entries will be added to lat list. Try the exercise below.
Updating germplasm records
Many elements of germplasm records in the BMS can be updated from the Germplasm Search Application. Click on Import germplasm updates from the Actions menu of Germplasm Search.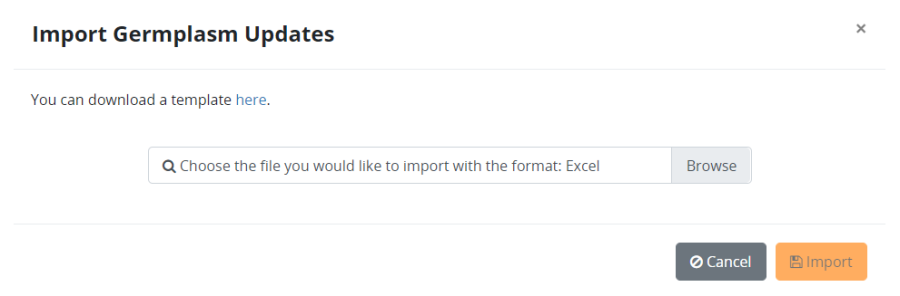
You can download a germplasm update template bu clicking on the "here" link:
Now suppose I want add accession numbers and make them the preferred name for germplasm BALAJAN with GID 3780217 and germplasm SINYARUE with GID 3781237.
First I have to define the germplasm I want to change by entering their GIDs in column A. I can also look up their unique identifiers on the Germplasm Details page and enter them in column B (instead of GID or as well as GID). Then I look up in the codes sheet the Cote for Name Type Accession number – ACCNO and I replace the heading in column G (DRVNM) with this code (ACCNO). Then since I want the accession number to be the preferred name I add the same code in column C of the template.
I can also change the germplasm location by entering a location abbreviation in column D, I can change the germplasm date by adding a valid date (YYYYMMDD) in column E, I can add a germplasm reference by adding a reference text in column F.
Finally, I can add any attributes I want. For example I can add some notes in column H and I can add columns after that with attribute codes from the codes sheet.
You complete the template as follows:
Once the template is complete browse to the file from the Import germplasm updates form and click Import. The updates will be applied and can be viewed in the germplasm details form: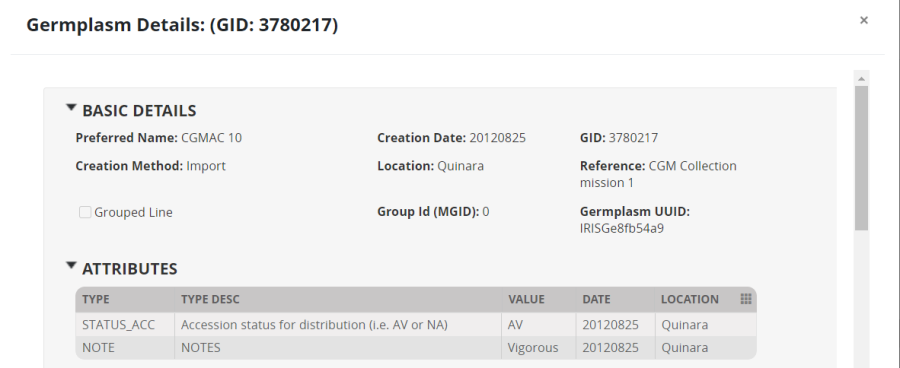

Exercise:
- Use the Actions Menu on the Germplasm List Browser to try exporting your list to and excel file.
- Use the Germplasm Search App to search the for the entry of IR 64 with GID 50533. Use the Action menu of the Germplasm Search App to add it to a new list called <your initials>Checks in your 2021 Lists folder, then search for IR 72 (GID 70125) and add that to the same list, finally search for NERICA 4 (GID 765439) and add that to the list. (Note you could search for all three GIDS at the same time and add all three to the new list).
- In the Germplasm List Browser open your checks list, select all three entries and add inventory lots from the actions menu. Specify location Bulk Seed Store, units KG and add initial deposits of 5 kg for all entries. Confirm the transactions.
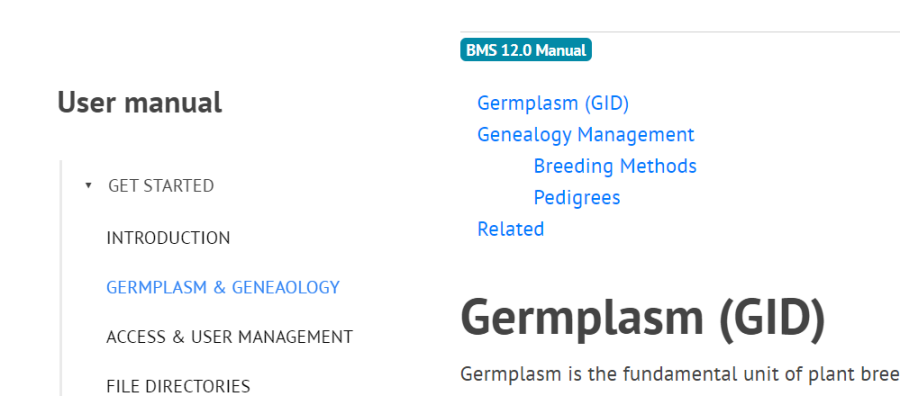
- Use the ? icon on the top right of the workbench to go to the help system. Click on the USER MANUAL section. Click on Germplasm and Genealogy and read about how BMS manages germplasm in a breeding program.
- Still in the MANUAL, click on BREEDING ACTIVITIES and then MANAGE GERMPLASM and look through the manual section for other things you can do with this application. Can you list some new things?