...
The other method of specifying crosses is to use a crossing template. We will show this option in the same nursery as the one where we demonstrated the Crossing Tool although generally you would use one method or the other but not both in the same nursery.
Open the study you created at the beginning of this tutorial (CGM21CB for me). To obtain a crossing template select Actions>Crossing options>Export crossing template: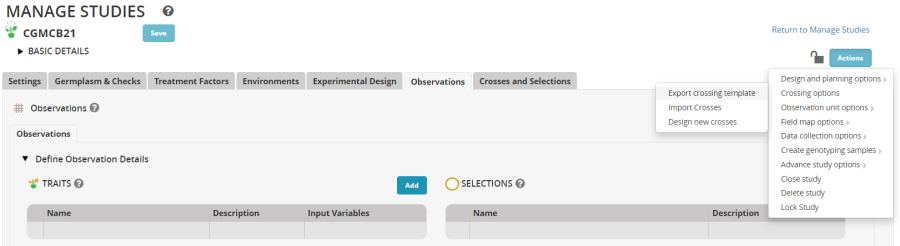
The Crossing Template is an excel file with four sheets. The first sheet is the description sheet and you can fill in some metadata about the F1 list you wish to create, such as a list name <your initials>21F1t, a description "2021 F1 list from crossing template" and a date.
The second sheet is the observation sheet and this is where we will specify the crosses we make.
The third sheet is a Codes sheet where we can look up user names for the description metadata and breeding method codes for the observation sheet. The fourth sheet, Study List is just a fieldbook of the planted material showing you what germplasm was planted on what plot.
On the observation sheet, the important columns are the FEMALE PLOT and the MALE PLOT. These are the plot numbers in the field layout (shown on the Study list sheet) which are crossed. You can either fill these columns as you do the crosses when the plants are flowering, or before you do the crossing as a specification of the crosses you want to make. The column MALE STUDY allows you to specify another study in the field from where pollen was collected. In this case the MALE PLOT is the plot in that study from where the pollen came. IF MALE STUDY is blank it is assumed to be the same study as the FEMALE PLOT.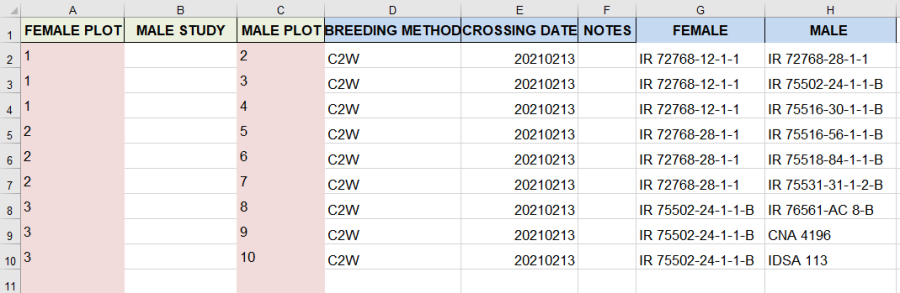
You can fill in the BREEDING METHOD column with the code for the method of crossing you are doing which you look up in the Codes sheet. C2W is the code for a single cross:
You can leave this column blank if you like and it will be filled by BMS.
Finally a CROSSING DATE is required, and NOTES may be useful. The two columns Female and Male are not required, they do not come with the template, but have been added here to show what crosses the plot pairs are producing. The have been filled with the excel functions VLOOKUP. (Optional)
=VLOOKUP(A2,'Study List'!$B$2:$F$17,5,FALSE) for Female and =VLOOKUP(C2,'Study List'!$B$2:$F$17,5,FALSE) for Male. Of course, this will not work for the Male if the pollen came from another study.
Once the crossing template is complete (at the end of the crossing cycle) you can import the crosses by selecting Actions>Crossing options>Import crosses.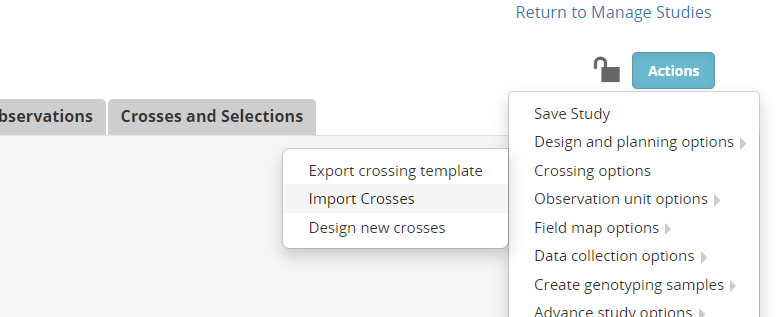
Choose the template file. If you have the Female and Male columns you get a warning that these will be ignored. And then you are asked to specify how the breeding method will be supplied.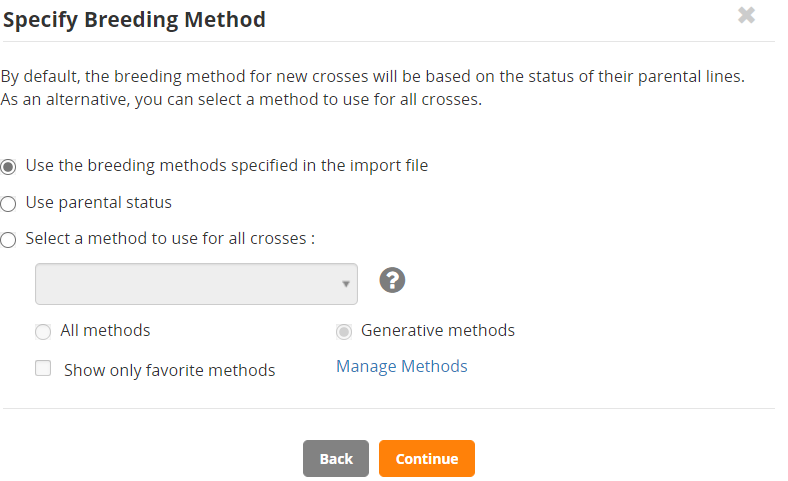
You can use the method specified in the template (if you specified it as we have), or you can get BMS to chose the method based on parental status, or you can pick the method for a list.
We continue with the default selection.
Now you need to specify a naming convention. We will check the Specify name format option. We will use the same format as we used in the last section: prefix AR20<your initials> with three digits for the sequence code: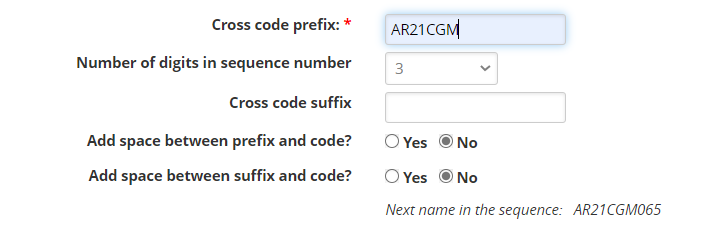
Notice that the next name in the sequence will be AR20CGM065 because we have already made 64 crosses with that naming pattern.
Specify the harvest month and the harvest location and check the box to be warned if the cross already exists (according to parental combination) in the database. Click continue.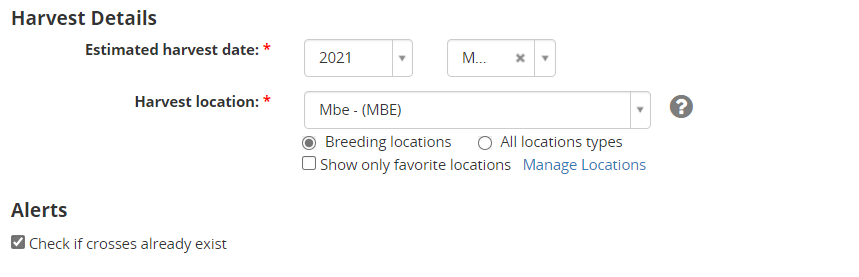
You will get a list of crosses to review:
You see in the ALERTS column that we are being warned that two of the crosses have been made before. If you click on View Existing Crosses you will see that those duplicates are crosses I made before (in the previous section):
At the moment, the The option to remove those duplicate crosses would be to cancel and go back to the template and remove them there. I will just keep the duplicates for this exercise (but would only advance one family in the field). select the Omit alerted crosses box. Click Finish and save the list.
You can also see the results in the Crosses and Selections tab where the 9 new crosses have been added to the previous crosses made.
...