...
Open the Fieldbook Application and click Settings.
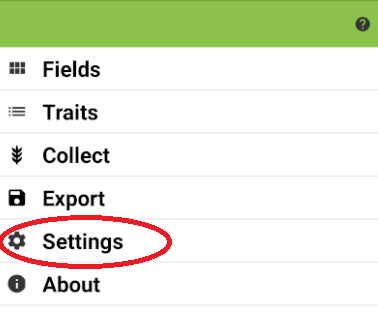
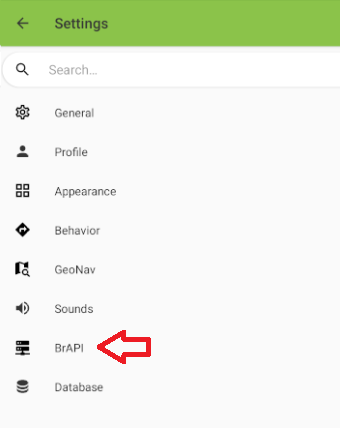
Under Settings, select BrAPI.
Under BrAPI, select BrAPI Version V1.
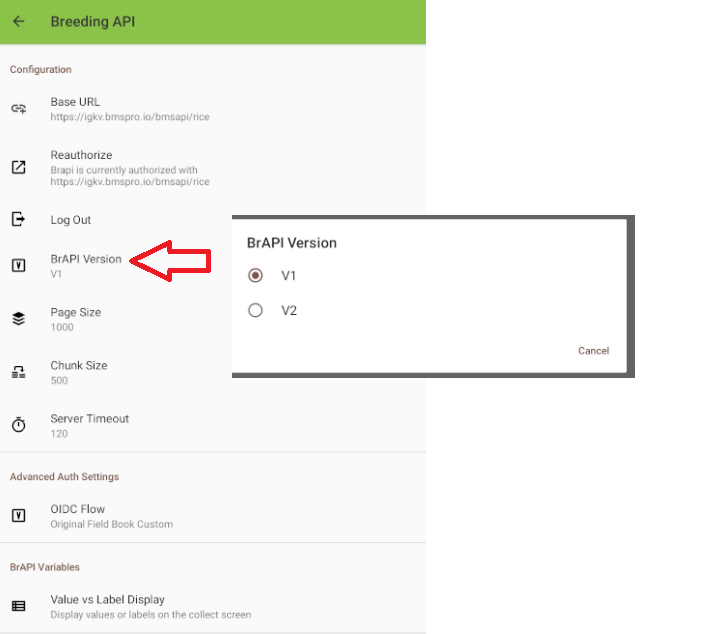
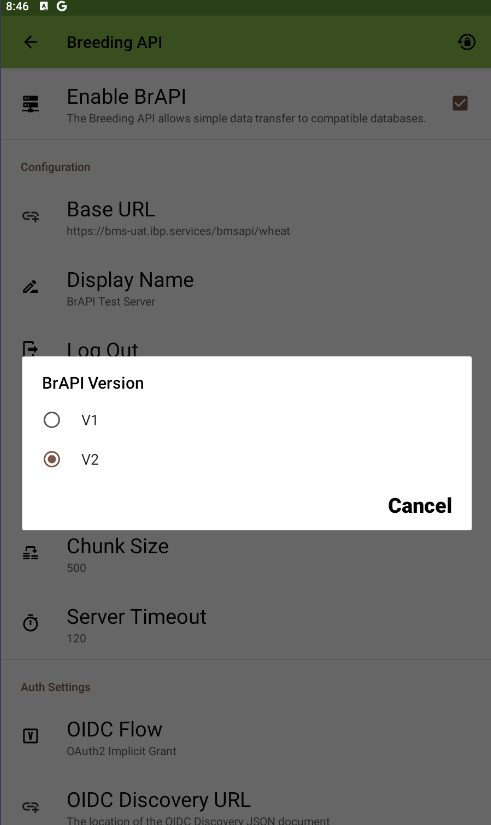
Note : Newer versions (5.5.xx) use V2
Under Advanced Auth Settings, select OIDC Flow then Original Field Book Custom

. Note : Newer versions (5.5.xx) use Auth Implicit Grant

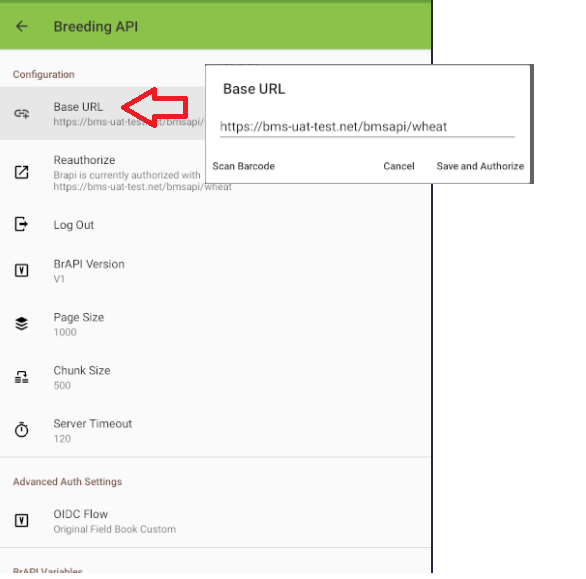
Select “Base URL”. Enter the BrAPI Base URL https://<institute’s BMS address>/bmsapi/<crop name> In this tutorial use : https://www.bms-uat-test.net/bmsapi/wheat In this example, we are connecting to use wheat crop.
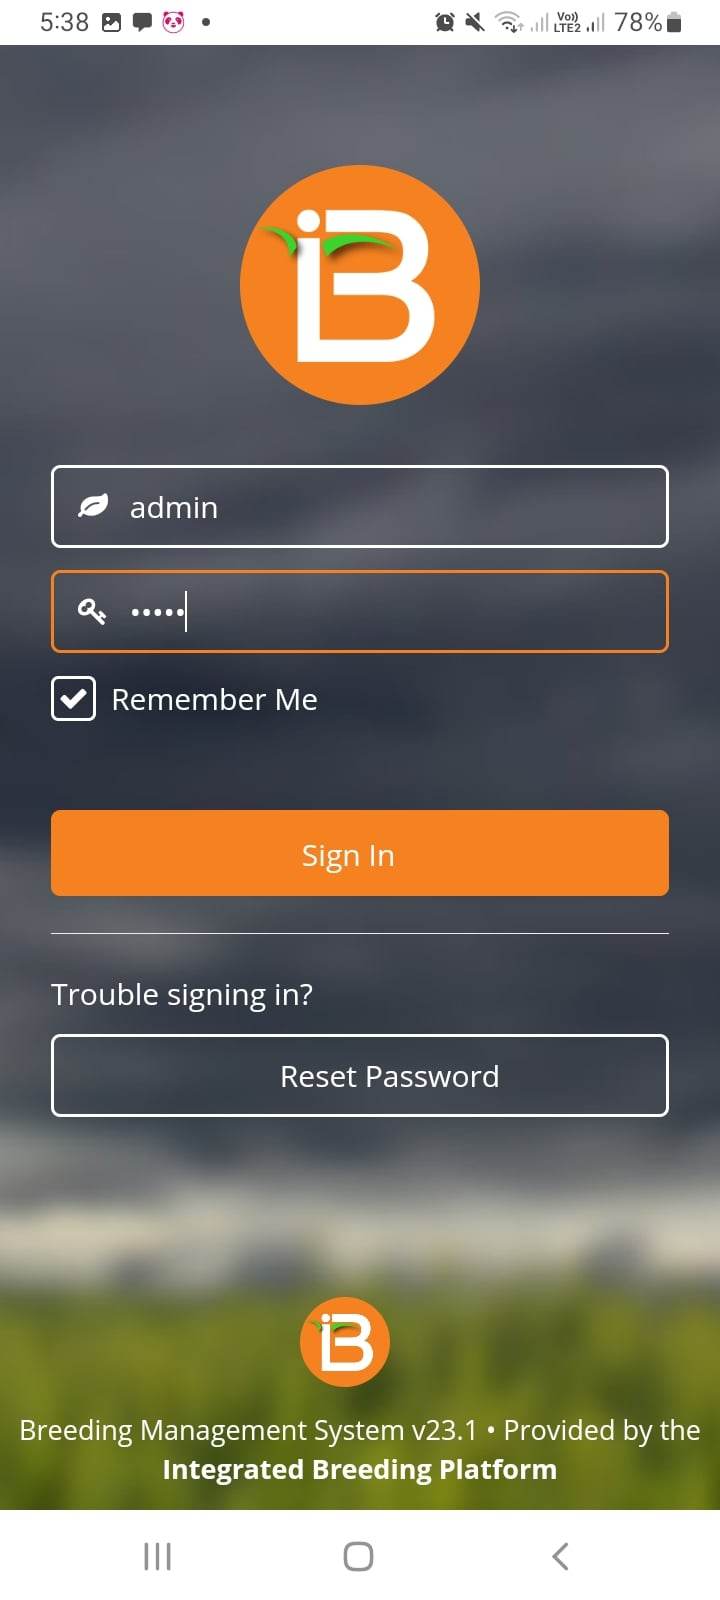
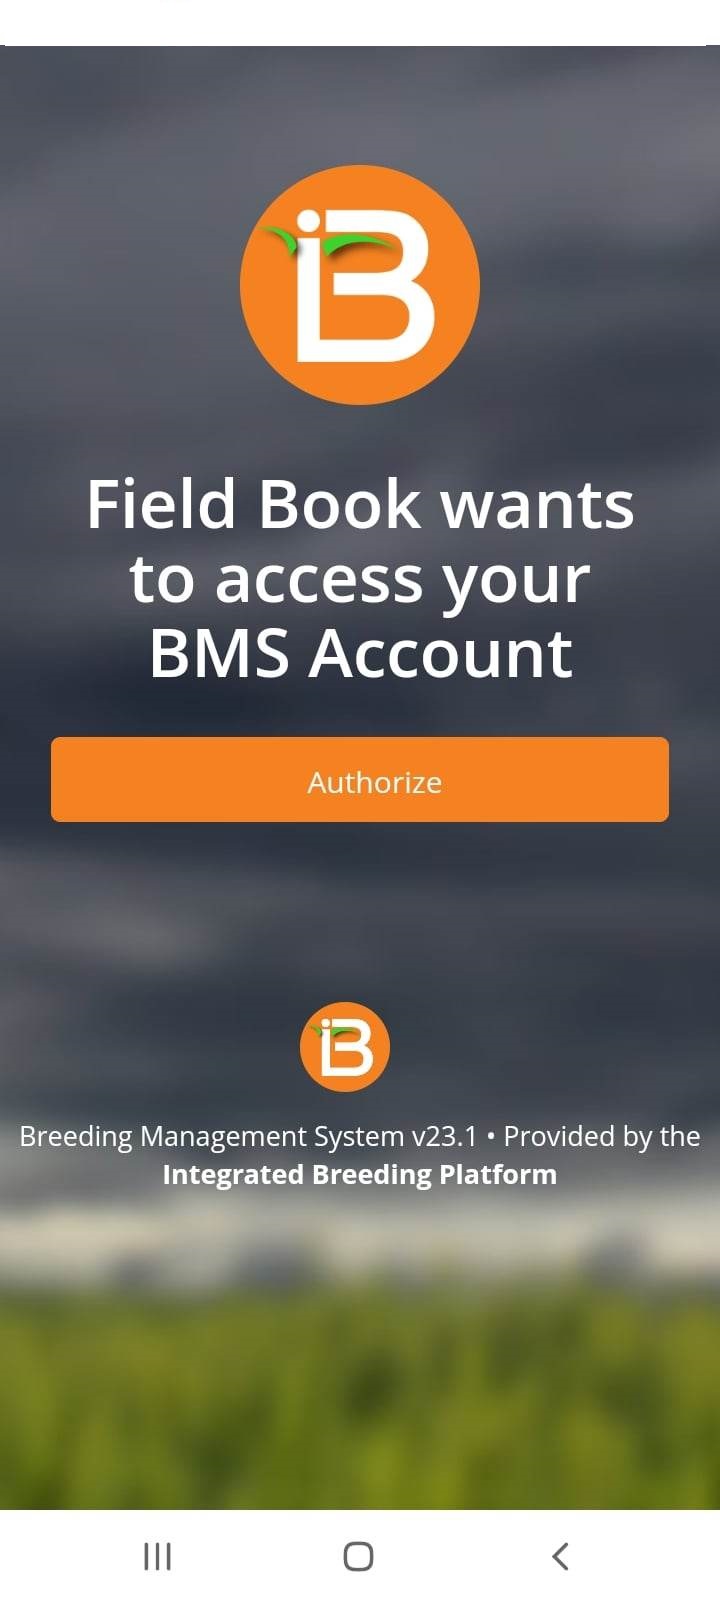
It will open the Authorization page. Enter the BMS login Name and Password

Click Authorize.

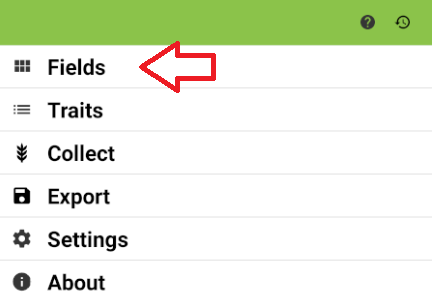
To get the study instances, exit Breeding API, Settings then click FIELDS.
To add environment instance into Fieldbook. Click on the + and select BrAPI
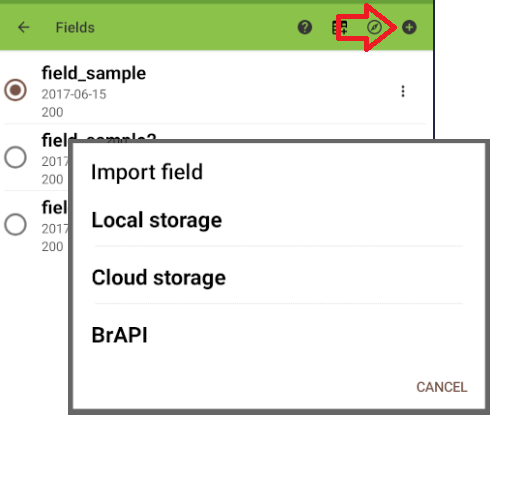
Environments may be filtered by program or by trial

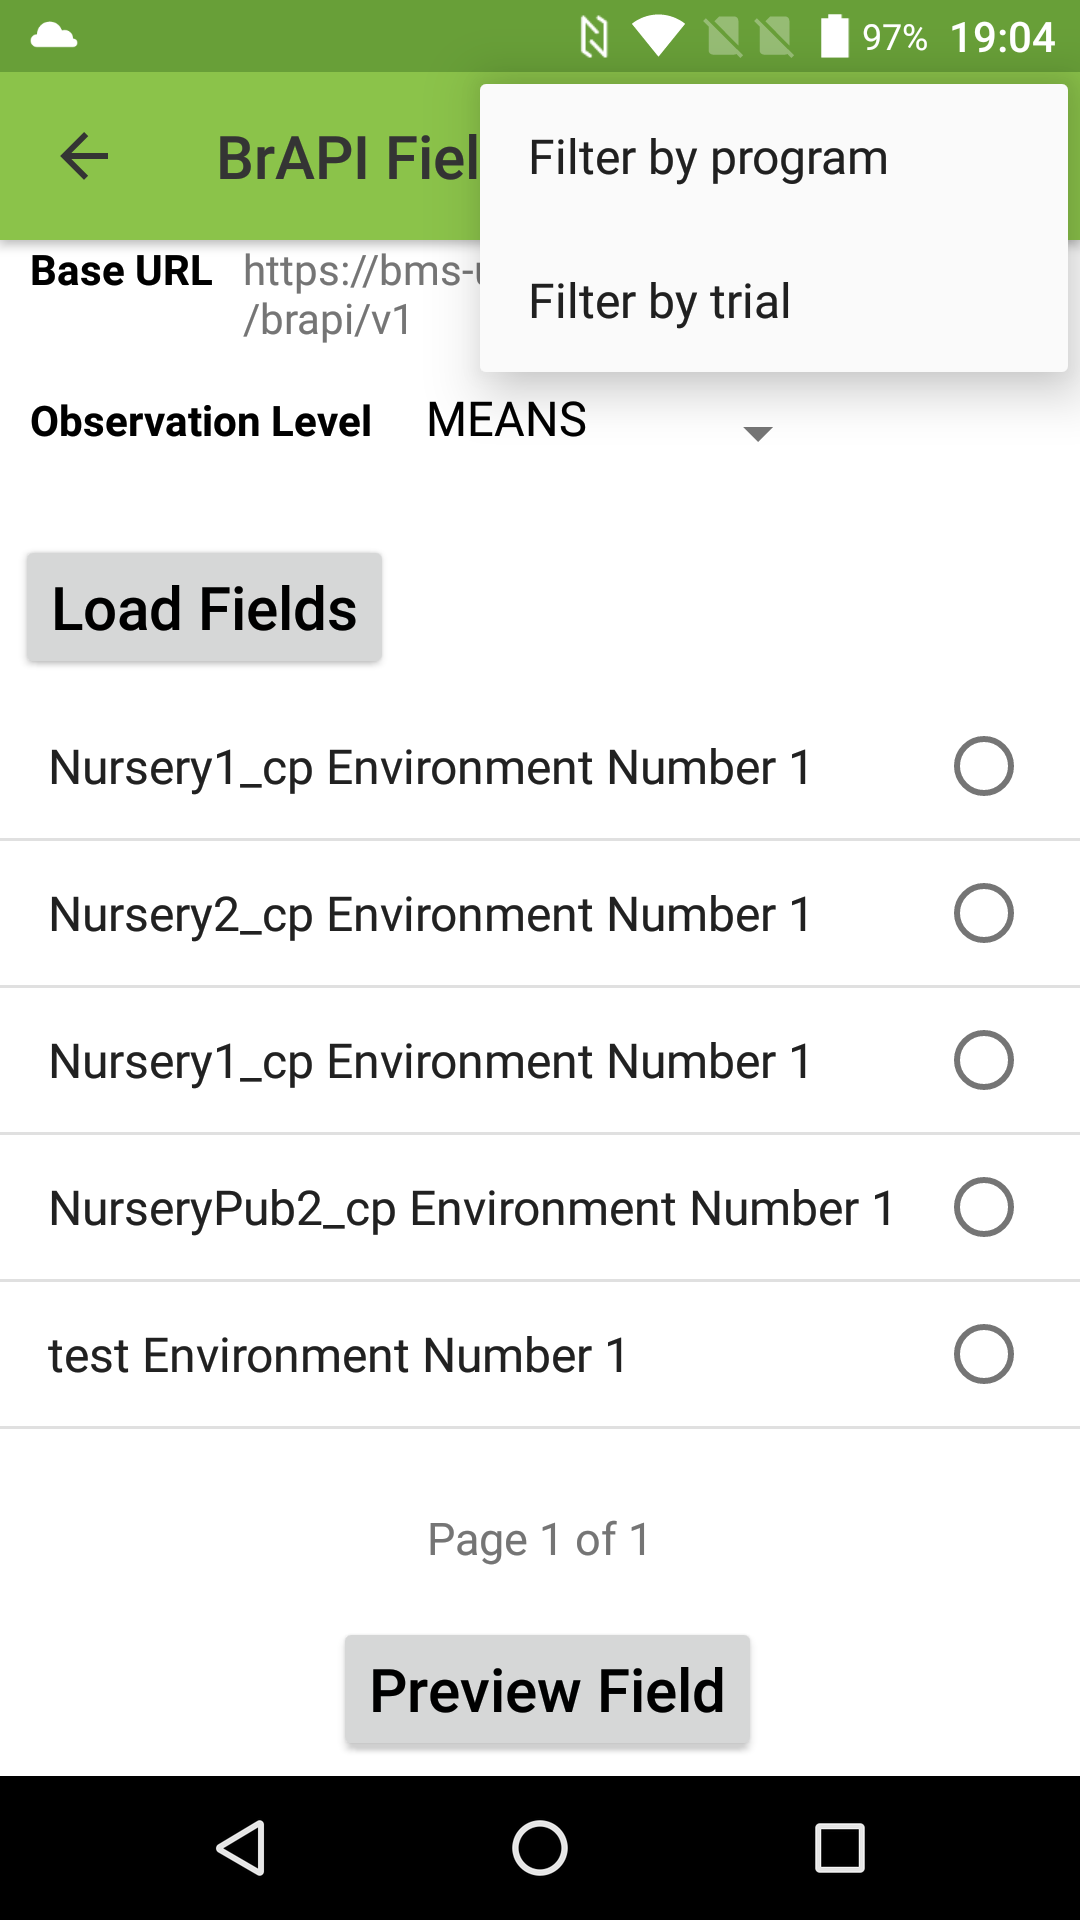
Observation Level must be set to PLOT if you wish to collect data at the plot level

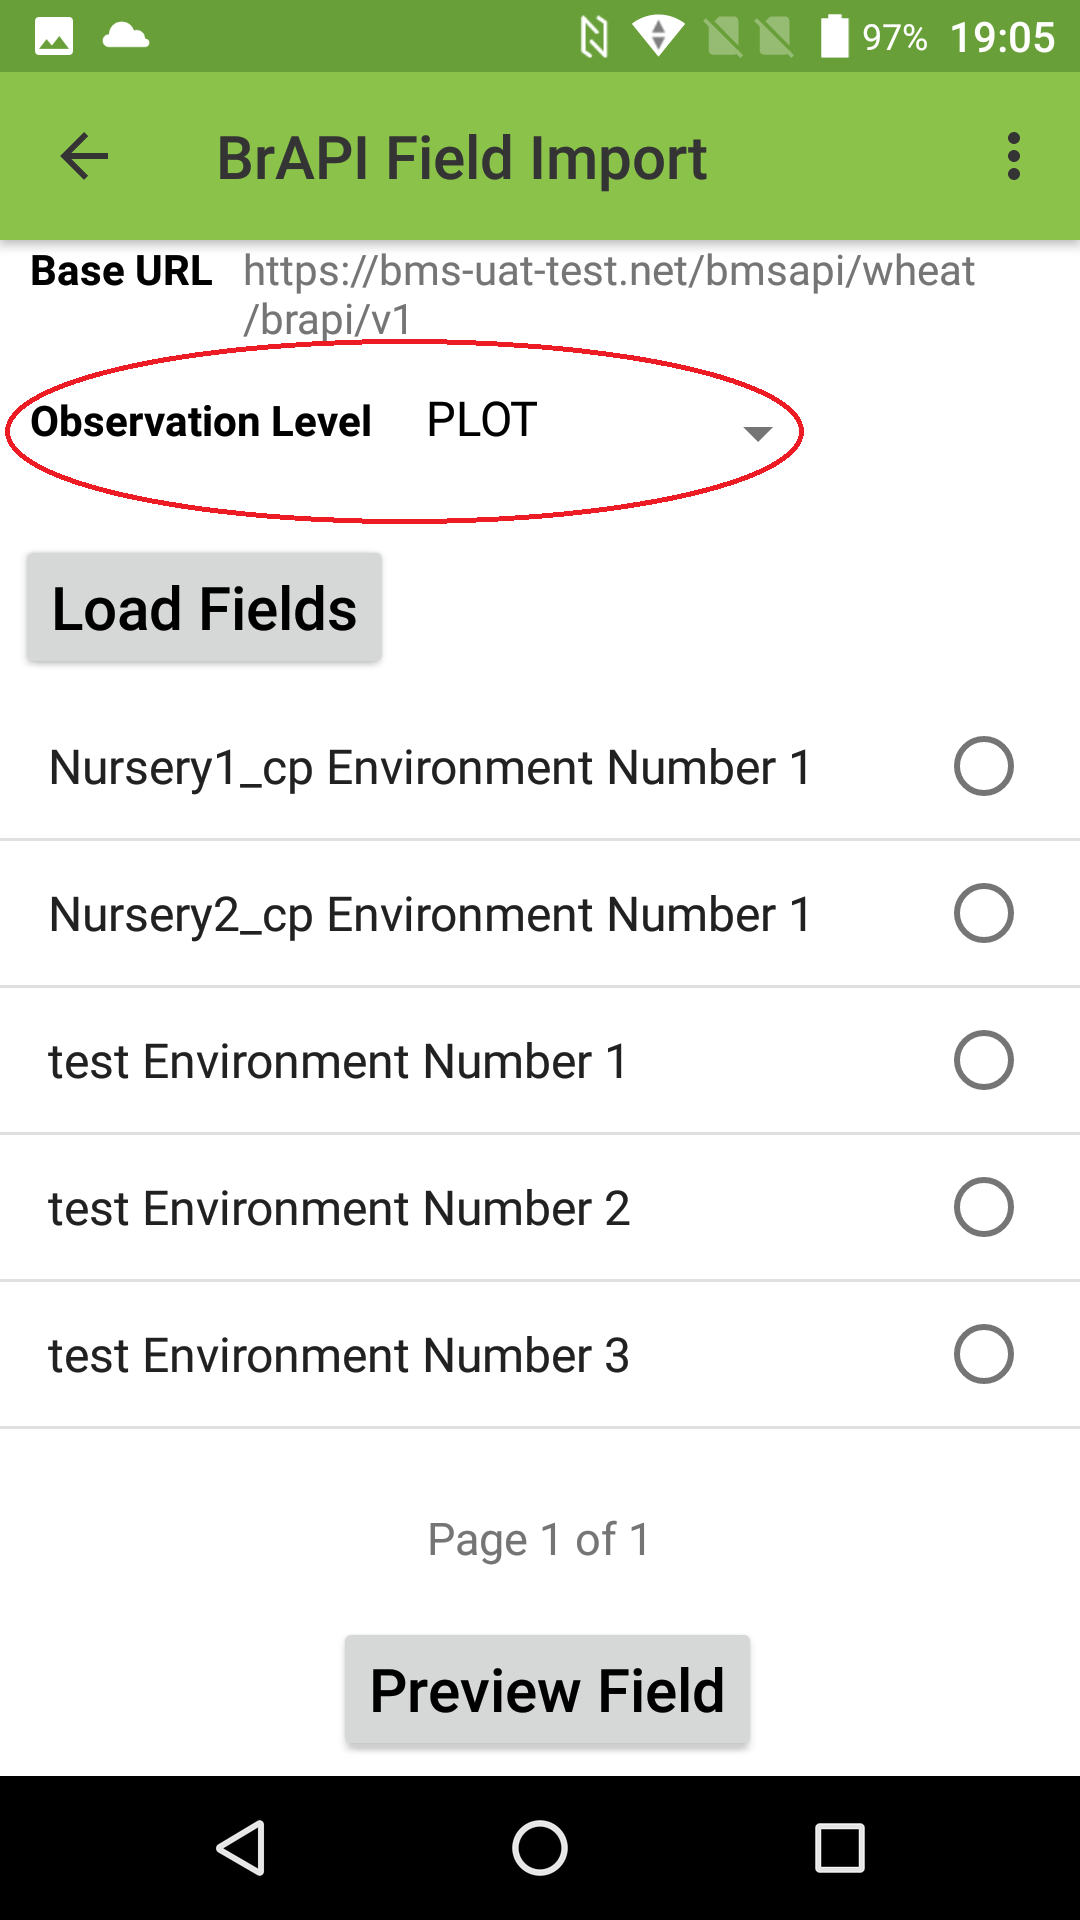
Select an environment from the List.
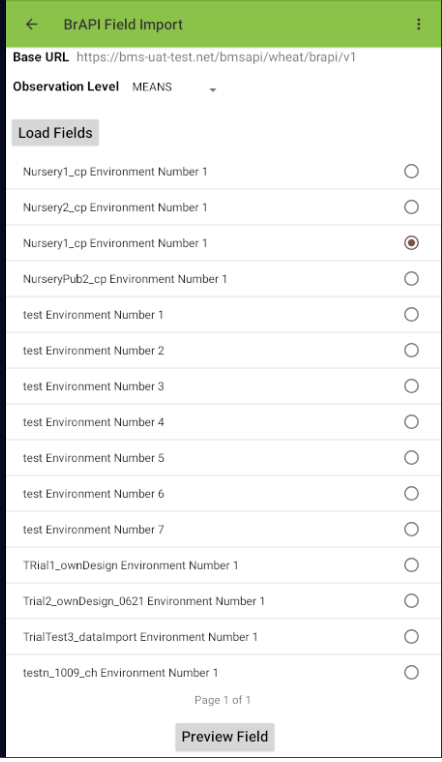
Click Preview Field. This allows users to check the field before saving.
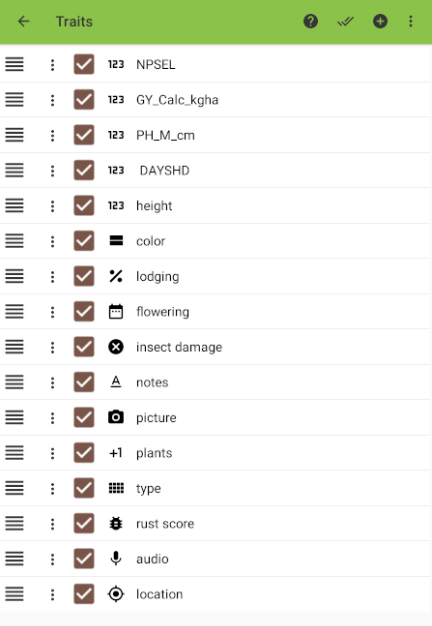
Click on Traits to select the traits that will be measured. Please take note that traits from other fields/environments will also be in the list of traits.
To start entering observed values, click “COLLECT”.
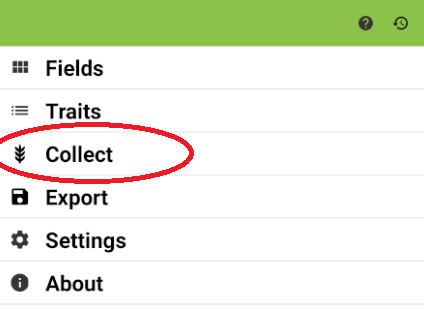
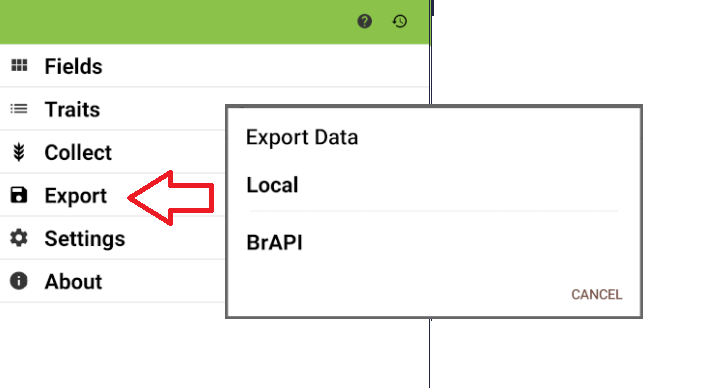
Collected observation values can be exported to BMS by clicking Export.
Data can be exported using Local storage or via BrAPI.
The number of new or modified observations will be shown. In this example, 4 New Observations have been collected. Click Export.
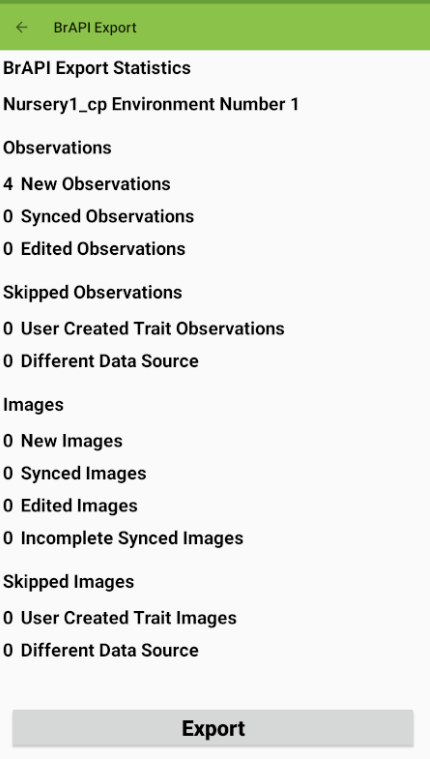
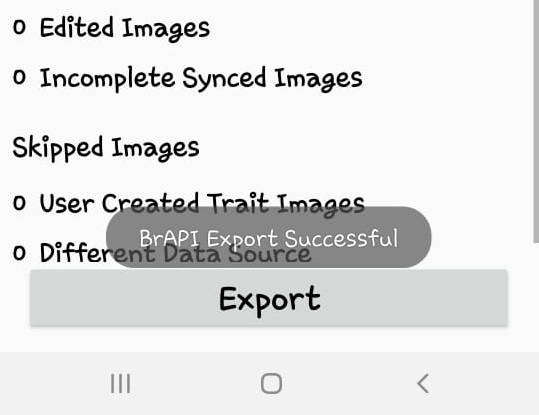
“BrAPI Export Successful” message shows up if the export is successful.
...