...
Filter germplasm by a variety of parameters
Create a new germplasm list
Add germplasm to an existing list
Import germplasm or germplasm updates
Group and ungroup germplasm
Apply code names to germplasm
Create inventory lots for germplasm

...
Filter germplasm
Filter germplasm by variety of mix and match data types.
...
Choose the Germplasm List filter.
...
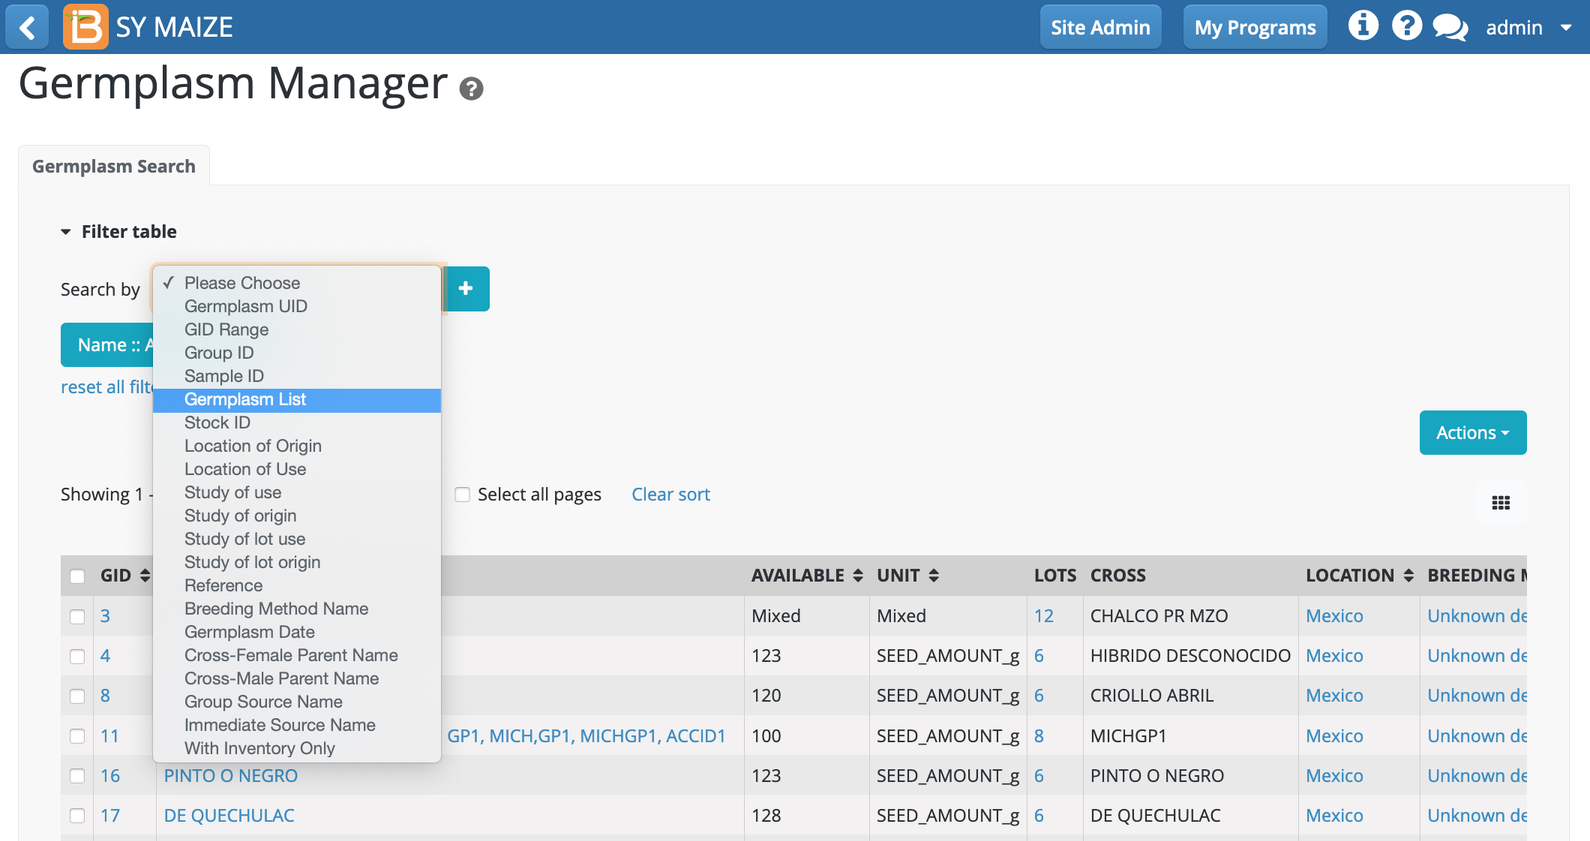
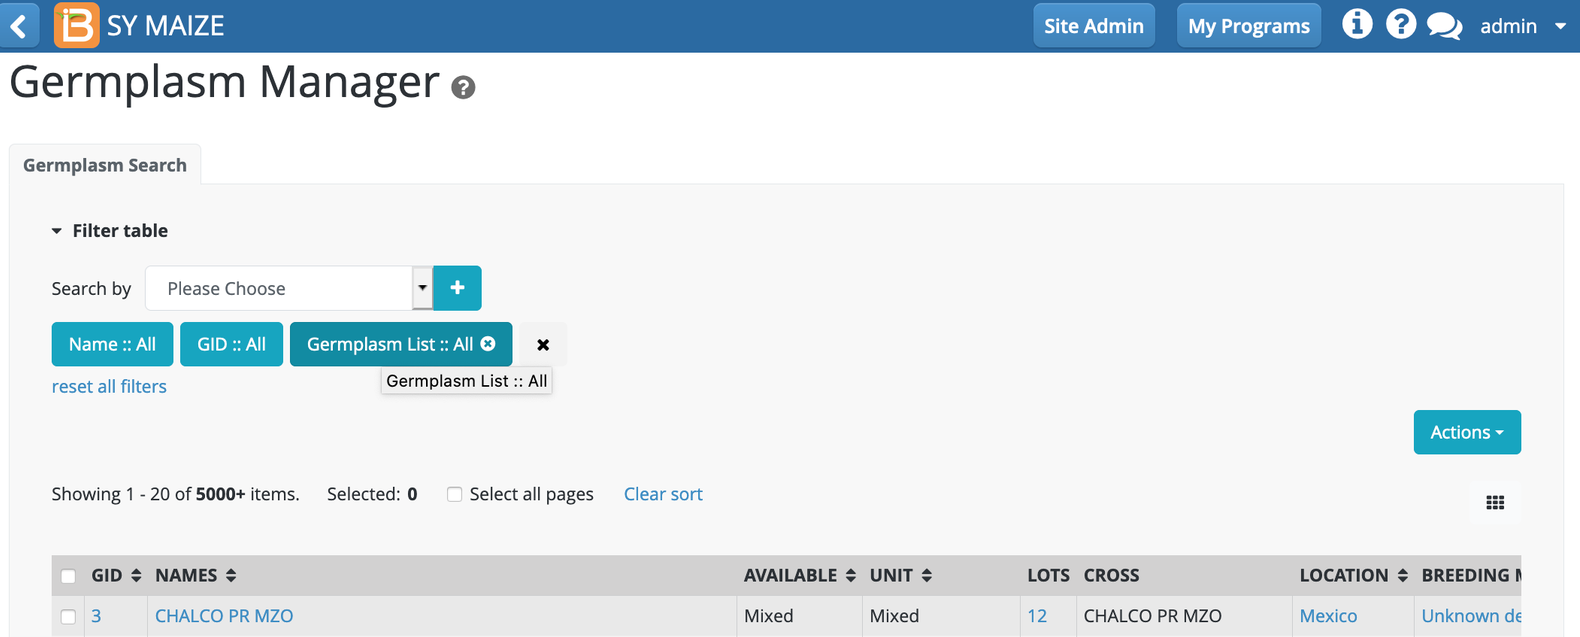
Select Click on the germplasm list filter (teal button). Germplasm List :: All in the following example.
...
Choose the list of interest. Ok.
...
The selected entries are now available to:
Create a new list
Add to an existing list
Import germplasm updates
...
Basic Details for GID 356865: The preferred name is CML578. The germplasm was created in the BMS January 1, 2019 by an unknown derivative breeding method at the International Center for Maize and Wheat Improvement. The germplasm isn't grouped, so there is not a group ID for this germplasm and its descendants. The germplasm UUID is a unique identifier with a statistically unlikely chance of being duplicated in another BMS database.
Attributes
Attributes are non-heritable descriptors of germplasm. For example, a for various actions.
...


Attributes
Attributes are non-heritable descriptors of germplasm. For example, a line can be deemed “drought tolerant” after characterization in a multi-location study. See below for more on editing attributes.
...
Attribute Example: "ETRC" indicates that CML578 is E. turcicum resistant.
...
Attributes can be edited via import Import germplasm updates.
...
Pedigree
The BMS database keeps a record of pedigree connections throughout the process of crossing and nursery advancement.
...
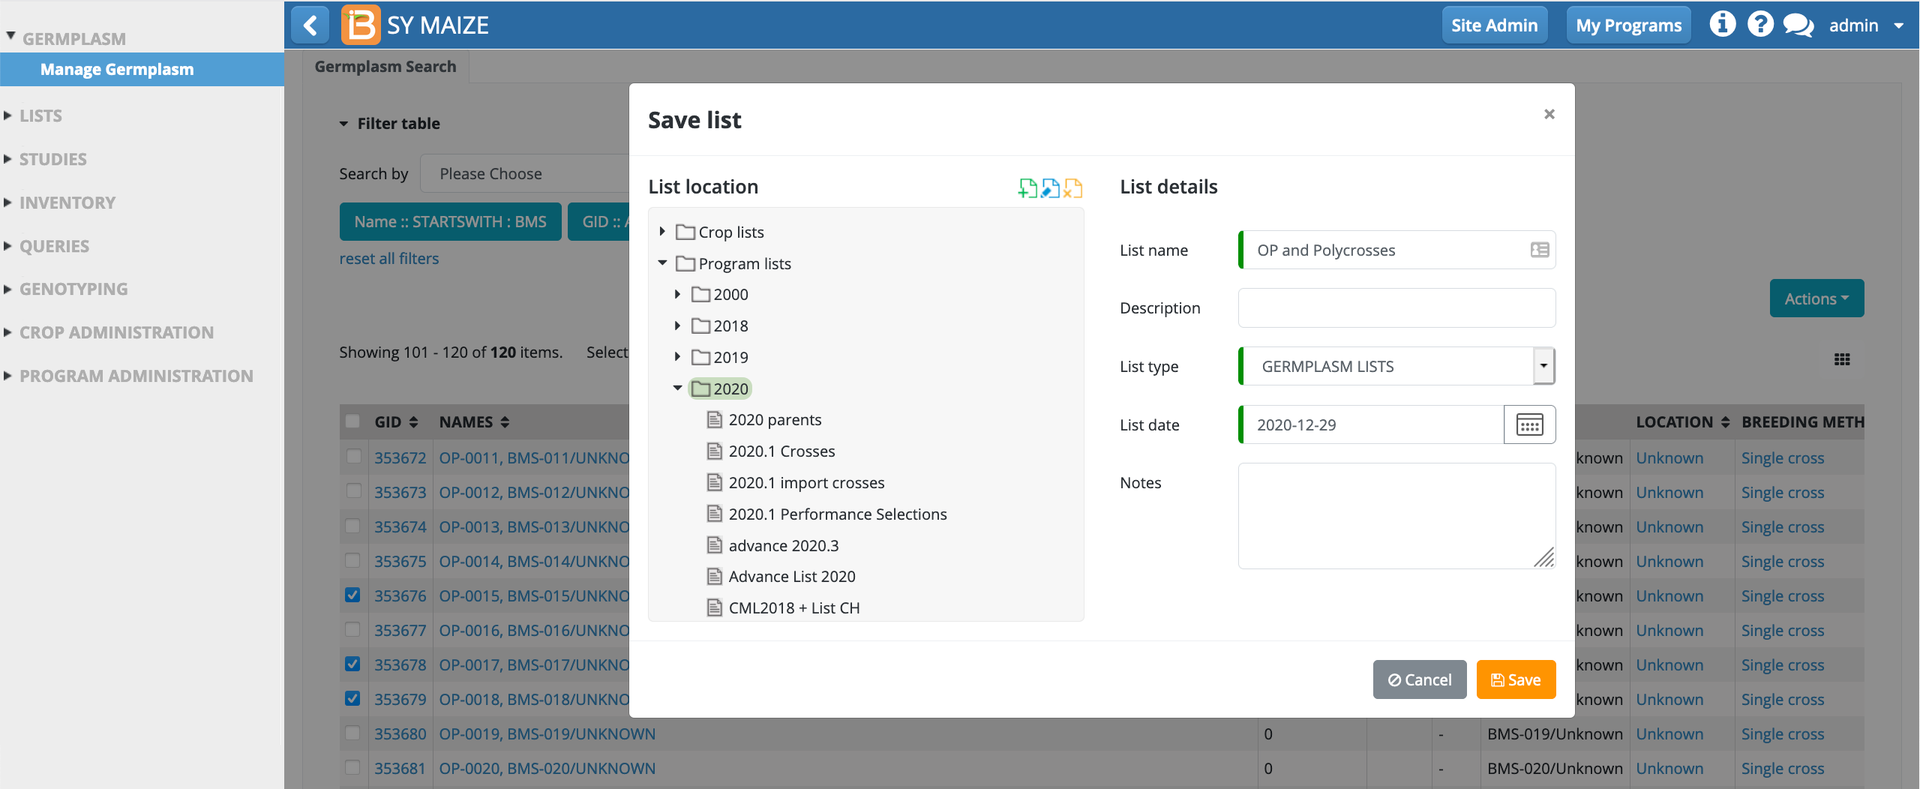
Using filters, select germplasm of interest. Select "Create New List" from the Actions menu.
...
Select or create a folder to house the new list. Name the germplasm list and Save. The germplasm list will then be available from the germplasm list filter and the Germplasm Lists module of the BMS.
...
Add to an existing list
Using filters, select germplasm of interest. Select "Add to an existing list" from the Actions menu.
Specify the list to which the selected germplasm will be added. Add. The germplasm will then be added to the specified germplasm list.
...

Import germplasm
From the Germplasm Manager Actions menu, select Import Germplasm. A Germplasm Import form will open and you can download an excel template from that form.
The Germplasm Import Template is very versatile for supplying a lot of information about new imported germplasm. It is also useful for assembling germplasm, whether new or existing in the database into lists and can be used to add inventory for new or existing entries. However, if the Germplasm exists in the BMS information will not be changed. To change or add information about existing germplasm you must use the Germplasm Editing features of the Germplasm Details forms, or the Germplasm Update template from the Germplasm Manager Actions menu.
The following example shows how to fill a Germplasm Import template with some germplasm information about some new germplasm that is not yet in the database.
Part 1. Names and location
...
Column Effect
A. Entry_NO must be filled with a sequential integer 1,2,3 …
B. You can have columns for different name types. By default two name types are listed, LNAME (Line name) and DRVNM (Derivative name) you can add more name types from the Codes sheet of the template (under the heading NAMES). At least one name is required. We will keep the default ones and fill them both with invented names as above.
C. CRSNM: We will also add Cross name (CRSNM) and fill that with some invented names for two new crosses. You must have one name, but can give more. All given names are added for new germplasm but new names are not added for existing germplasm, that must be done with the Germplasm Update template.
D. DRVNM: Fill with derivative names if you have them.
E. PREFERRED_NAME enter the name type column heading that you want to be the preferred name for each new germplasm entry. If you leave it blank, the first name will be preferred.
F. ENTRY_CODE is just a code name for the entry in the list. It is local to the list.
G. LOCATION_ABBR is the abbreviation of the location where the germplasm was produced. You can look up some location abbreviations in the Codes sheet, but this is not a complete list and you can look up others in the BMS Manage Locations page. We will select BKE for the lines which is the abbreviation for Bouake as in our example of the Codes sheet. We will select CNRRI for the crosses. These abbreviations may not be available in your Codes sheet so select ones that are there.
H. REFERENCE you can provide text which will be added as a reference new germplasm.
Part 2. Pedigree information and attributes
...
Column Effect
I. CREATION_DATE You can enter the date the germplasm was created, collected or received according to your convention. Format YYYYMMDD.
J. BREEDING_METHOD You can fill the column with the code of the breeding method finally used to produce the entry You can see the codes on the Codes sheet. UDM is Unknown Derivative Method, DSP is Single Plant Selection, C2W is a two-way cross and UGM is Unknown Generative Method.
K. PROGENITOR1 and PROGENITOR2 can be used to capture pedigree information for the line or the cross. They need to be filled with GIDs of progenitors, the progenitors must already exist in the BMS (You must import the parents first if necessary). If the entry is a cross (an F1 like entries 3 and 4 in the example) then PROGENITOR1 should contain the GID of the female parent and PROGENITOR2 the GID of the male parent if they are known.
L. If the entry is a derived line (not F1) then PROGENITOR2 should contain the GID of the immediate source of the entry, in this case PROGENITOR1 should be set to zero. However if the immediate source is not known, but the cross from which the entry was derived, is known then PROGEITOR2 should be zero and PROGENITOR1 should be set to the cross from which the entry was derived.
M. You can add attributes for the entries being imported by adding columns with headings obtained from the Passport or Attributes sheets of the Template. If the attribute you want is not there you must add it first through the ontology manager. A column for NOTES has be added by default. Add some notes.
Part 3. – Inventory and unique identifiers
...
Column Effect
N. STORAGE LOCATION ABBR is for the abbreviation of the seed storage location where you will store the seeds associated with this import list. These seed storage location abbreviations are looked up on the Codes sheet. New ones must be entered through the Location Manager.
O. UNITS contains the name of the storage units for each entry from the list on the Codes sheet.
P. This contains the amount of seed going into storage for new or existing entries. If some inventory entries are blank BMS will ask if you want those left blank of filled with set values at the time of importing.
Q. STOCK ID is a short unique ID for the seed lot. It is better to let the BMS assign these codes since they must be unique.
R. PUI can contain Public Universal Identifiers for the entries. The BMS will assign a unique code, the GUID, but if a suitable global public identifier exists you can enter it in the PUI column and it will be stored as a name for the new germplasm, the GUID will also be created.
the Germplasm Manager Actions menu.
See v20 Import Germplasm Template for instructions on how to fill a Germplasm Import template with some germplasm information about some new germplasm that is not yet in the database.
Now select Germplasm Import from the Actions menu of the Germplasm Manager and select the file you have saved to see the effect of the settings.
...
The pencil button is visible and enabled for a user with Edit Germplasm permission. Germplasm basic details, names, descriptors (eg. passport information, attributes), pedigree, and files can be modified.


The trashcan trash can button is visible and enabled for a user with Delete Germplasm permission.
...
Click on Import germplasm updates from the Actions menu of Germplasm Manager and download a template.
See v20 Import germplasm updates template for instructions on how to fill the template.
...
Column Effect
A. GID – Fill the GID column with the GIDs of the germplasm for which you wish to change the pedigree information.
...
Germplasm created in the system erroneously can be deleted. Once deleted, the designation and GID will not appear in germplasm searches. The GID is not available for reuse after deletion.
The system will prevent deletion of germplasm:
if the germplasm has inventory
if the germplasm exists in multiple lists
if the germplasm is associated with a nursery or trial
if the germplasm is fixed
if the germplasm has descendants
...
Confirm deletion.
...


The germplasm that was chosen for deletion does not meet the validation criteria. In this case, the germplasm has associated inventory and descendants in the database.
Merge Germplasm
NomenclatureGlossary
Target germplasm: The germplasm that the user has decided to keep from the merge selection
...